Content area: Creating a new Story
In Storyblok, the content area displays the pages and folders in your space. You can access it by selecting the Content option {1} from the lefthand menu.
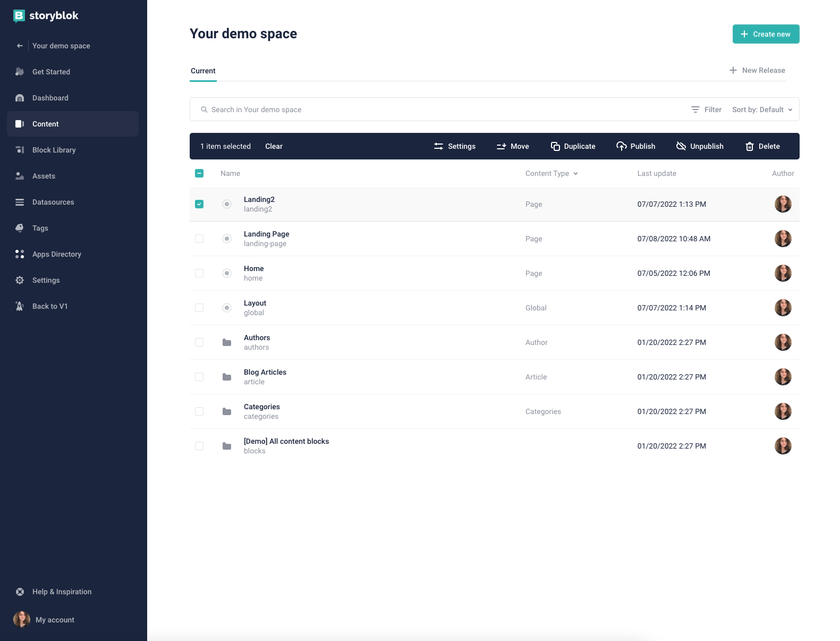
Each entry will display the following information from left to right: publication status (opens in a new window), name and slug, Content Type, Last update, and Author. If the content is a folder, it will display the folder icon instead of a publication status {2}.
You can organize and manage your content using three tools: the search bar, filtering, and sorting. To use the search bar {3}, click on it and start typing. It will automatically return any content matching the search term.
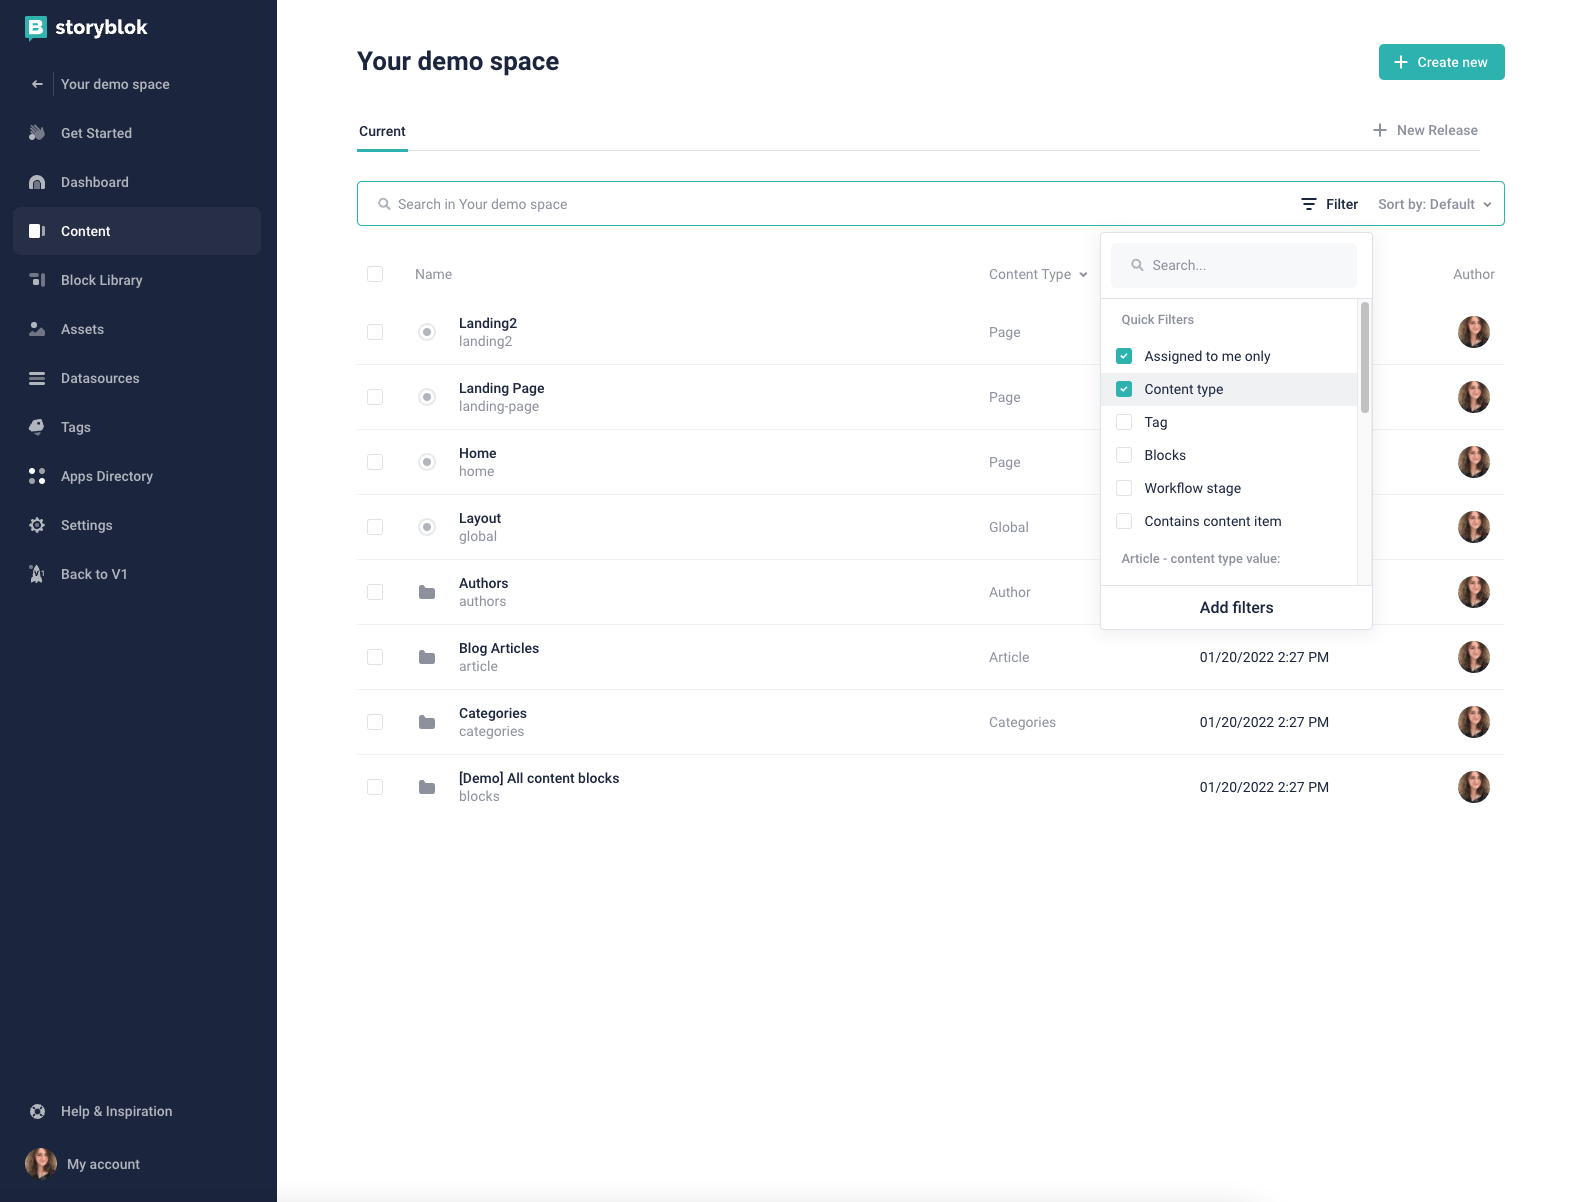
Filters {1} narrow down your results based on their traits. For example, you may choose to only view certain content types or categories. You can use the search bar from the dropdown menu to find the filter you want to use. Click on the checkbox {2} then Add filters {3} to apply it. You can apply multiple filters at once.
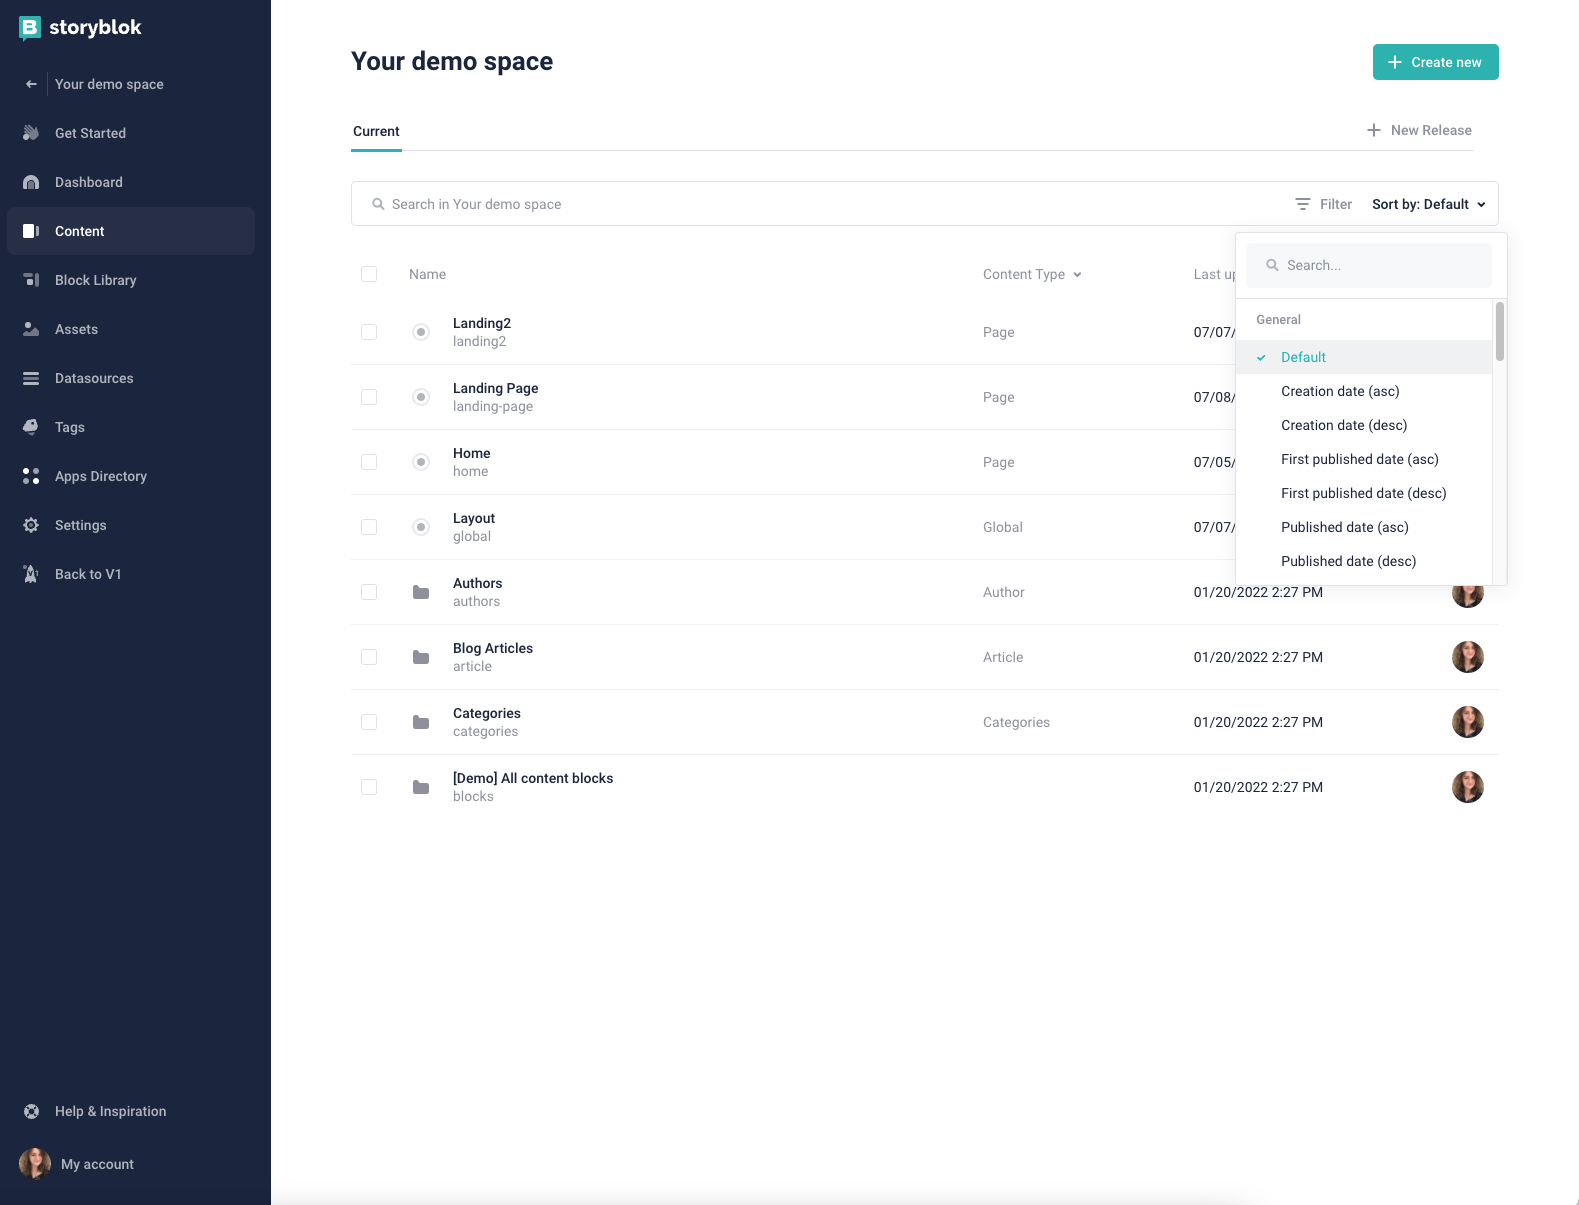
In addition to filtering, you can also sort content by clicking Sort by {1}. Sorting will not exclude any entries. Instead, it will organize them based on the criteria you provide. For example, you may choose to sort by the most recent publishing dates, alphabetically by title, or content type values. You can use the search bar to find the sorting options you want to use. You may only select one sorting option.
Creating a new Story
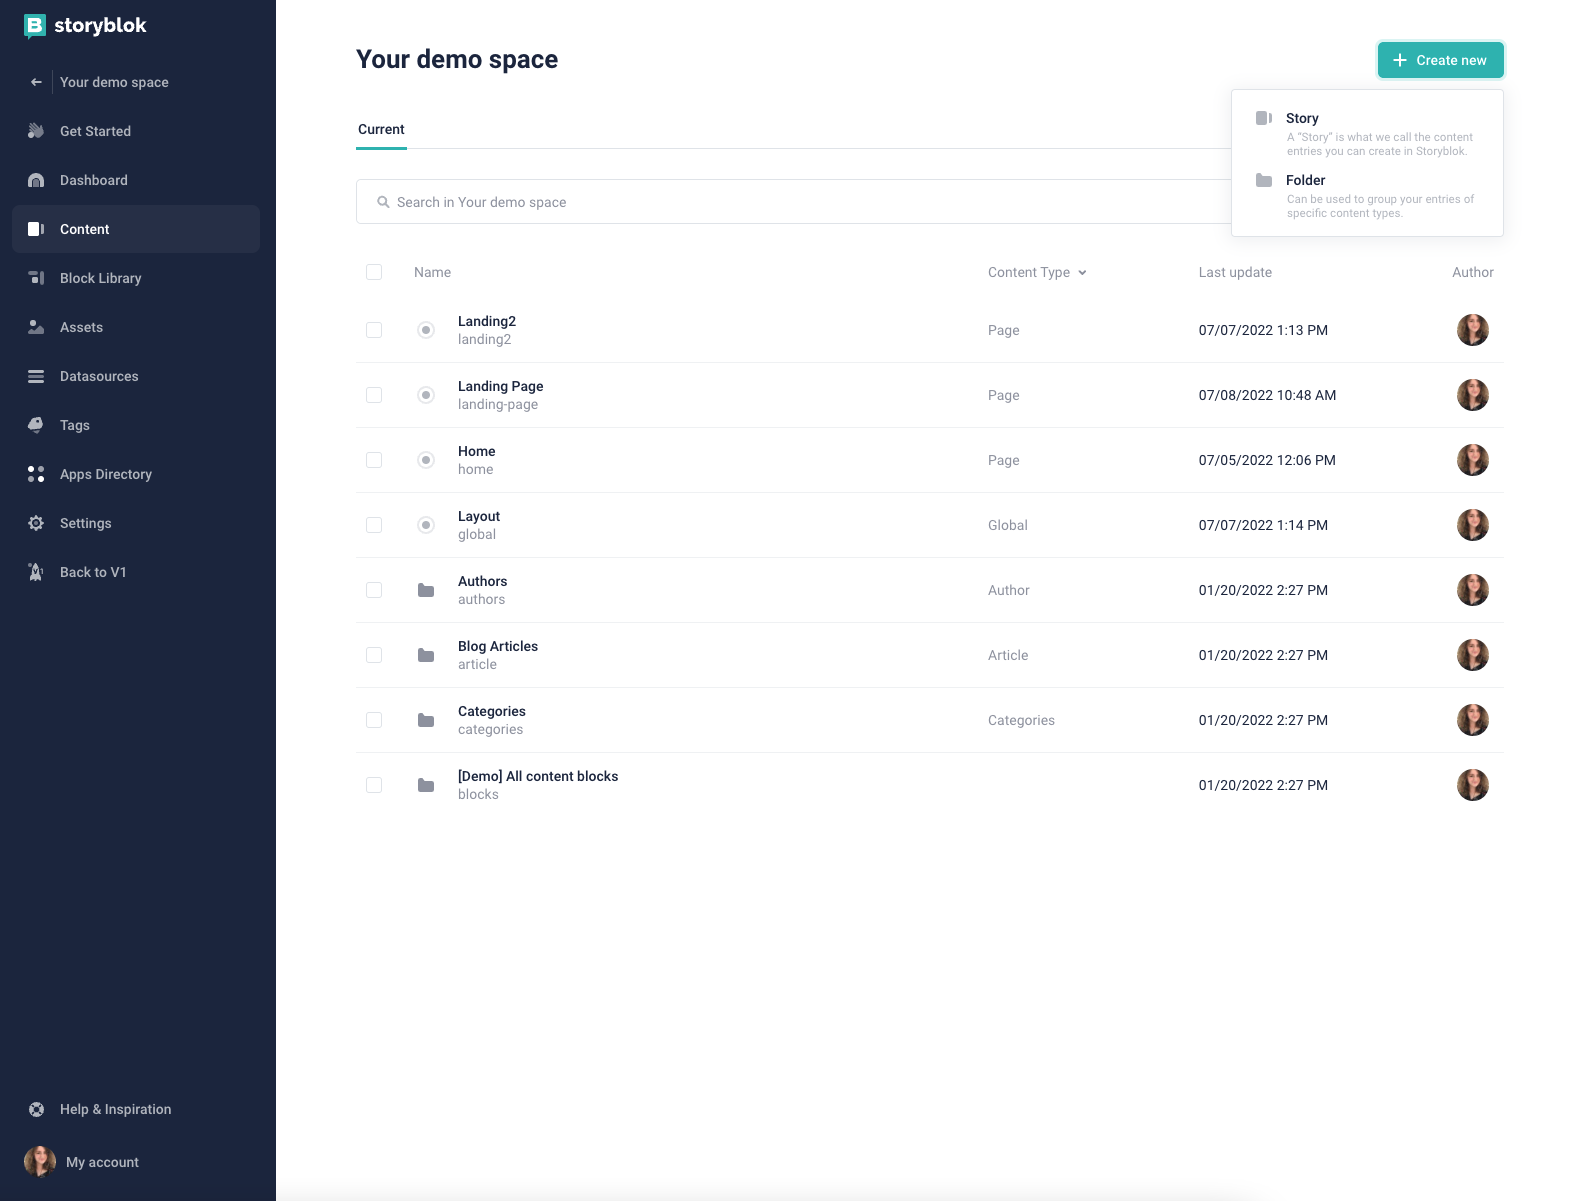
You can create content entries from the content area. To begin, click on Create new {1} from the top right corner. You can then choose between a new Story and a new folder:
If you decide to create a Story, you will then see this screen:
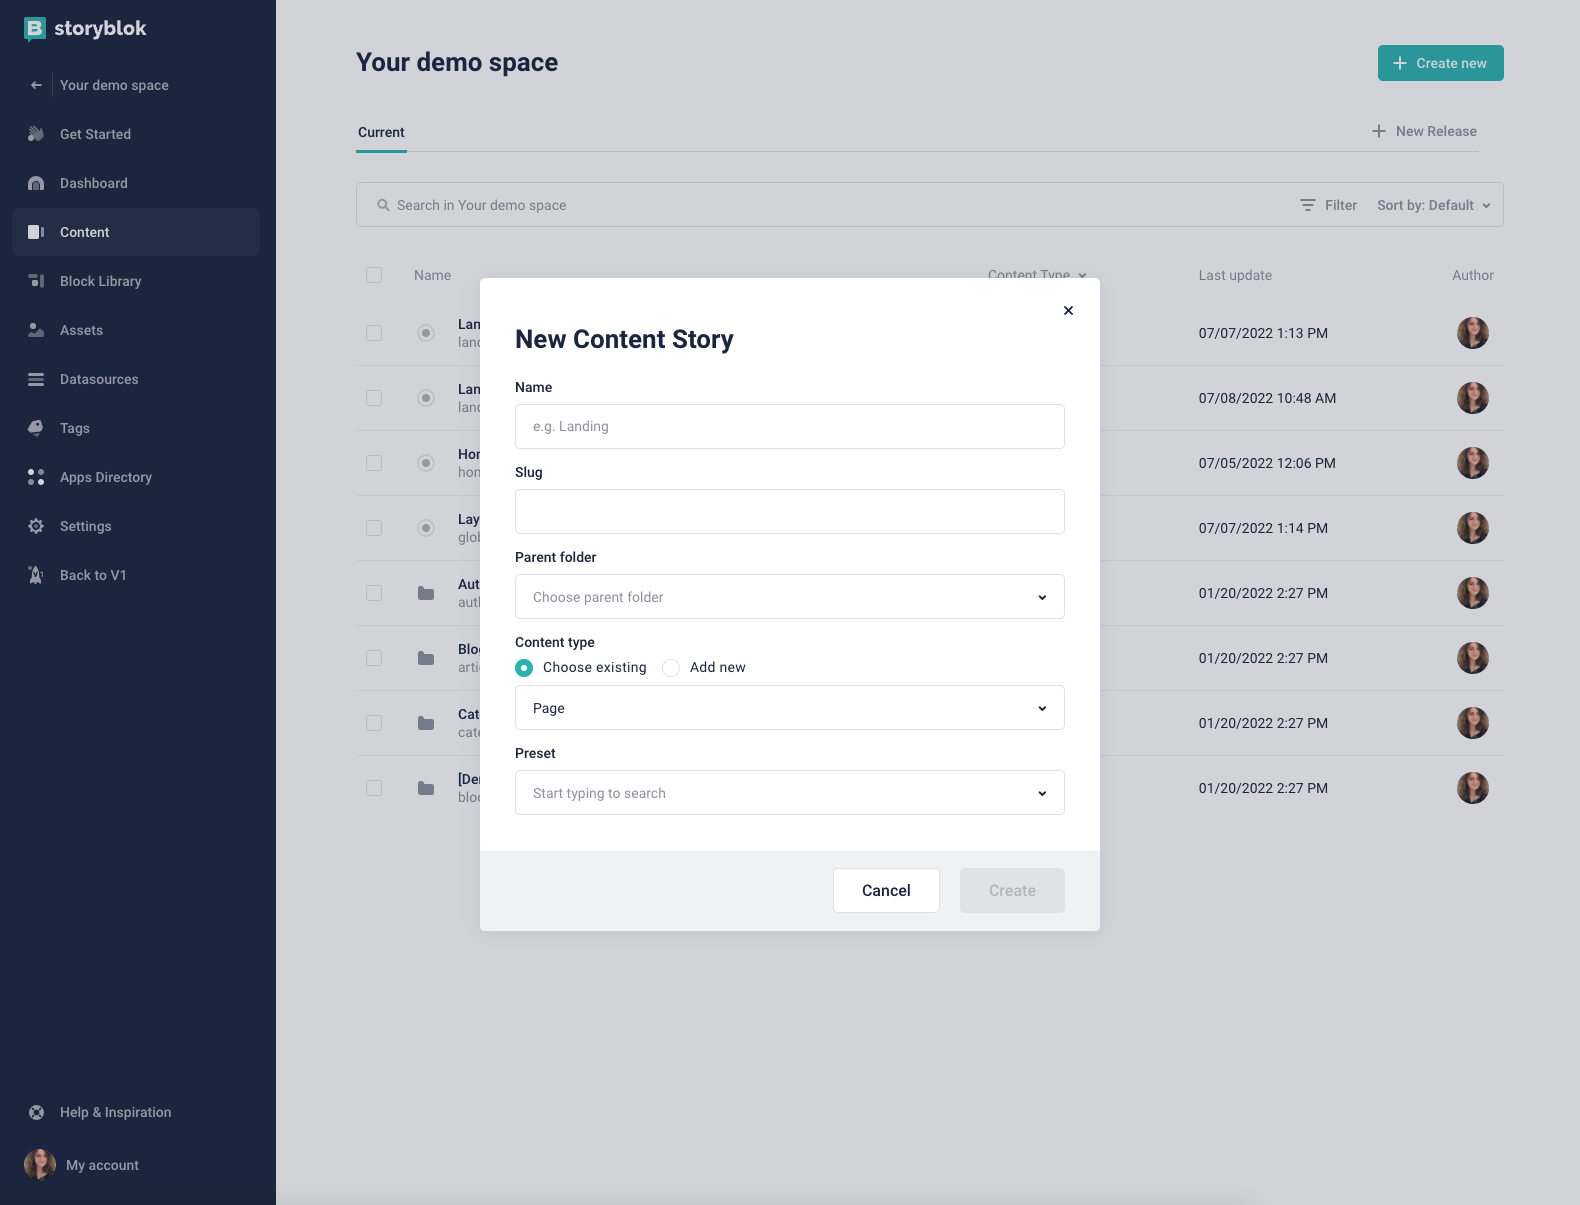
You can determine the name {1} and create the slug {2}. You can also choose a parent folder {3} for the Story to place it in that location. You can choose an existing content type to structure the entry or build a new one {4}. Finally, if you have a preset story structure, you can select it in the Preset field {5}.
If you want to create a new folder, select that option from the Create new button {1} instead to view this screen:
You will have the opportunity to create a name {2} and slug {3}. You can also choose a parent folder {4} to nest the new one in. Similar to creating a new Story, you can also choose an existing content type, create a new one, or opt not to have one at all.
Folders have unique content settings as well. By selecting Deny changing content type, you’ll be locking in that field. Nobody else will be able to change it. Disabling the visual composer, on the other hand, will place focus on the component definition. However, if you want to use the live preview after setting it up, you can change this setting.
Editing content entries: Move, Publish, Unpublish, and Delete
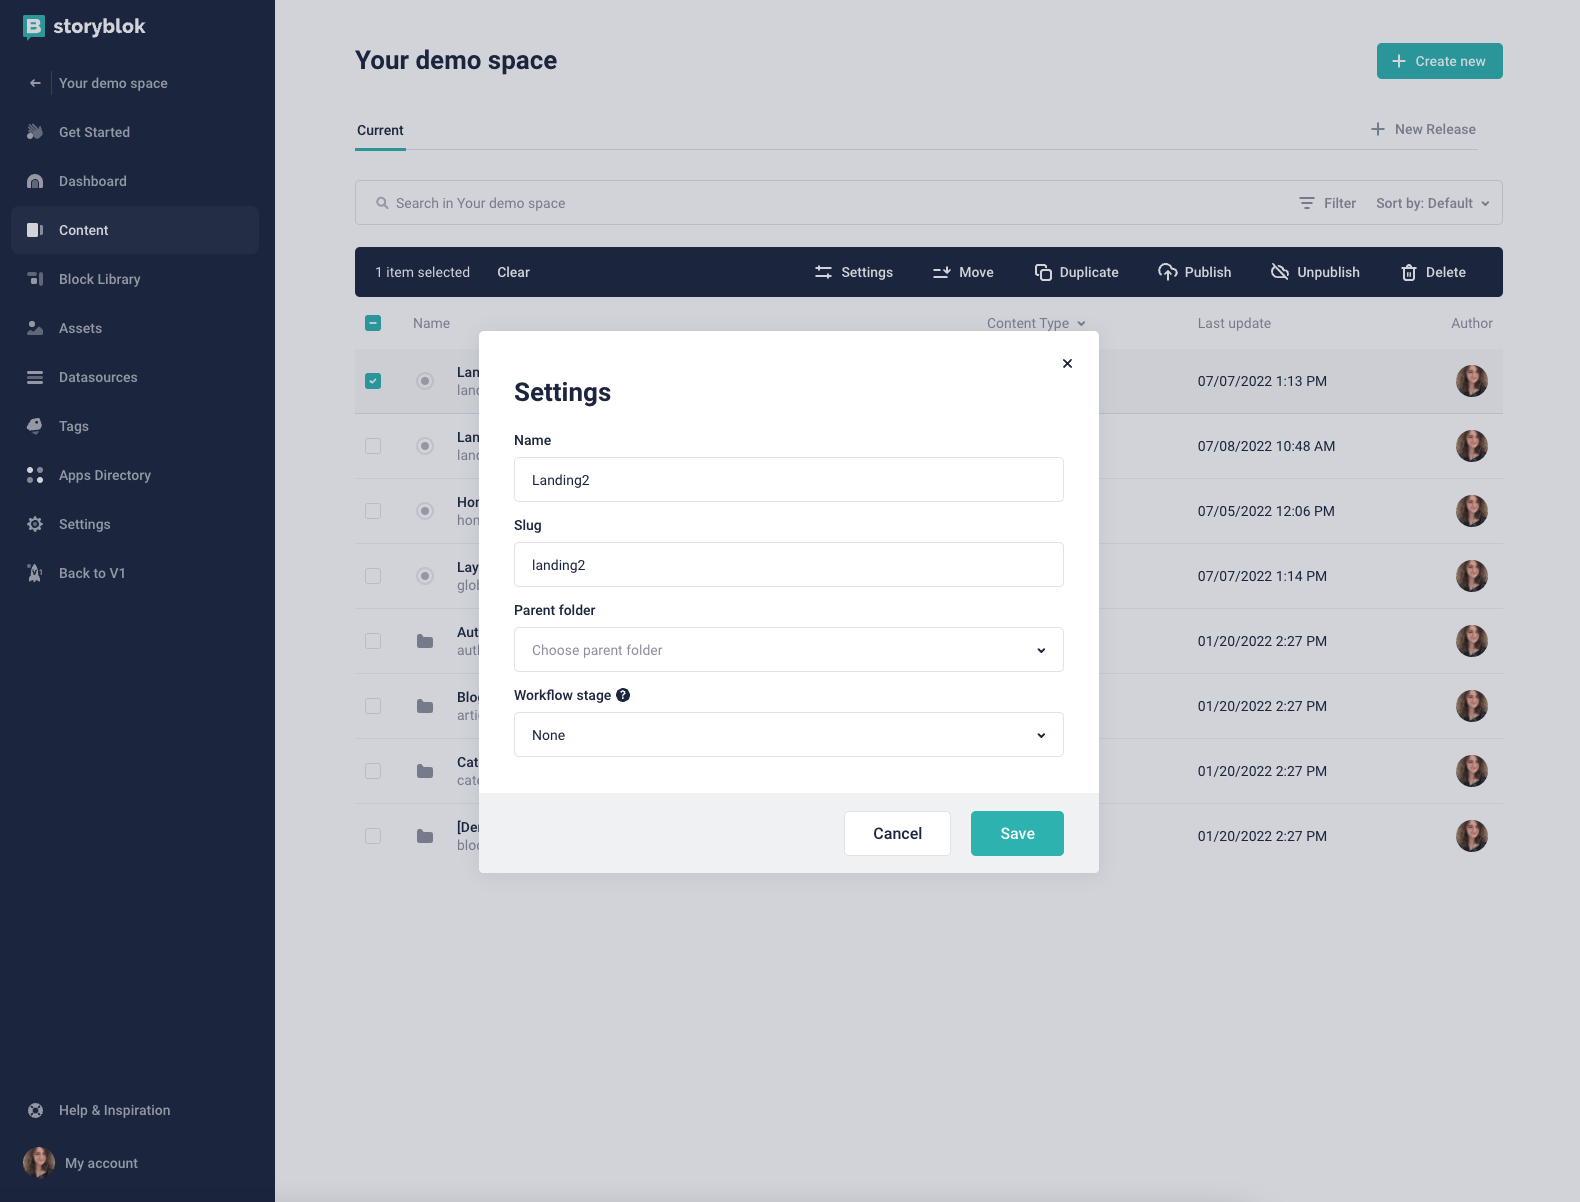
You can edit broad settings for your entries from the content area. Once again, select the checkbox for the entry or entries you want to edit. You can then decide to move, publish, unpublish, or delete them. For more specific adjustments, select a single piece of content and click Settings {1}:

You can change that entry's name, slug, parent folder, and workflow stage from here. Click Save {2} to apply your changes.
You can use the New Release (opens in a new window) tab to release content at a certain time. After installing the Releases App from the App Directory, there will be a "New Release" tab to click on it to provide a name, specific release time, and date. Any content in this section will not be released until that time. You can also not choose a release date and manually push the content when ready.
For more details on how to schedule content with Releases App, see this documentation.
Duplicating content
Another way to create content is by duplicating existing entries. Start by selecting the checkbox next to the content you want to duplicate. To duplicate multiple entries, select multiple checkboxes. You will then get the option to Duplicate {1}. Click on it to pull up this screen:
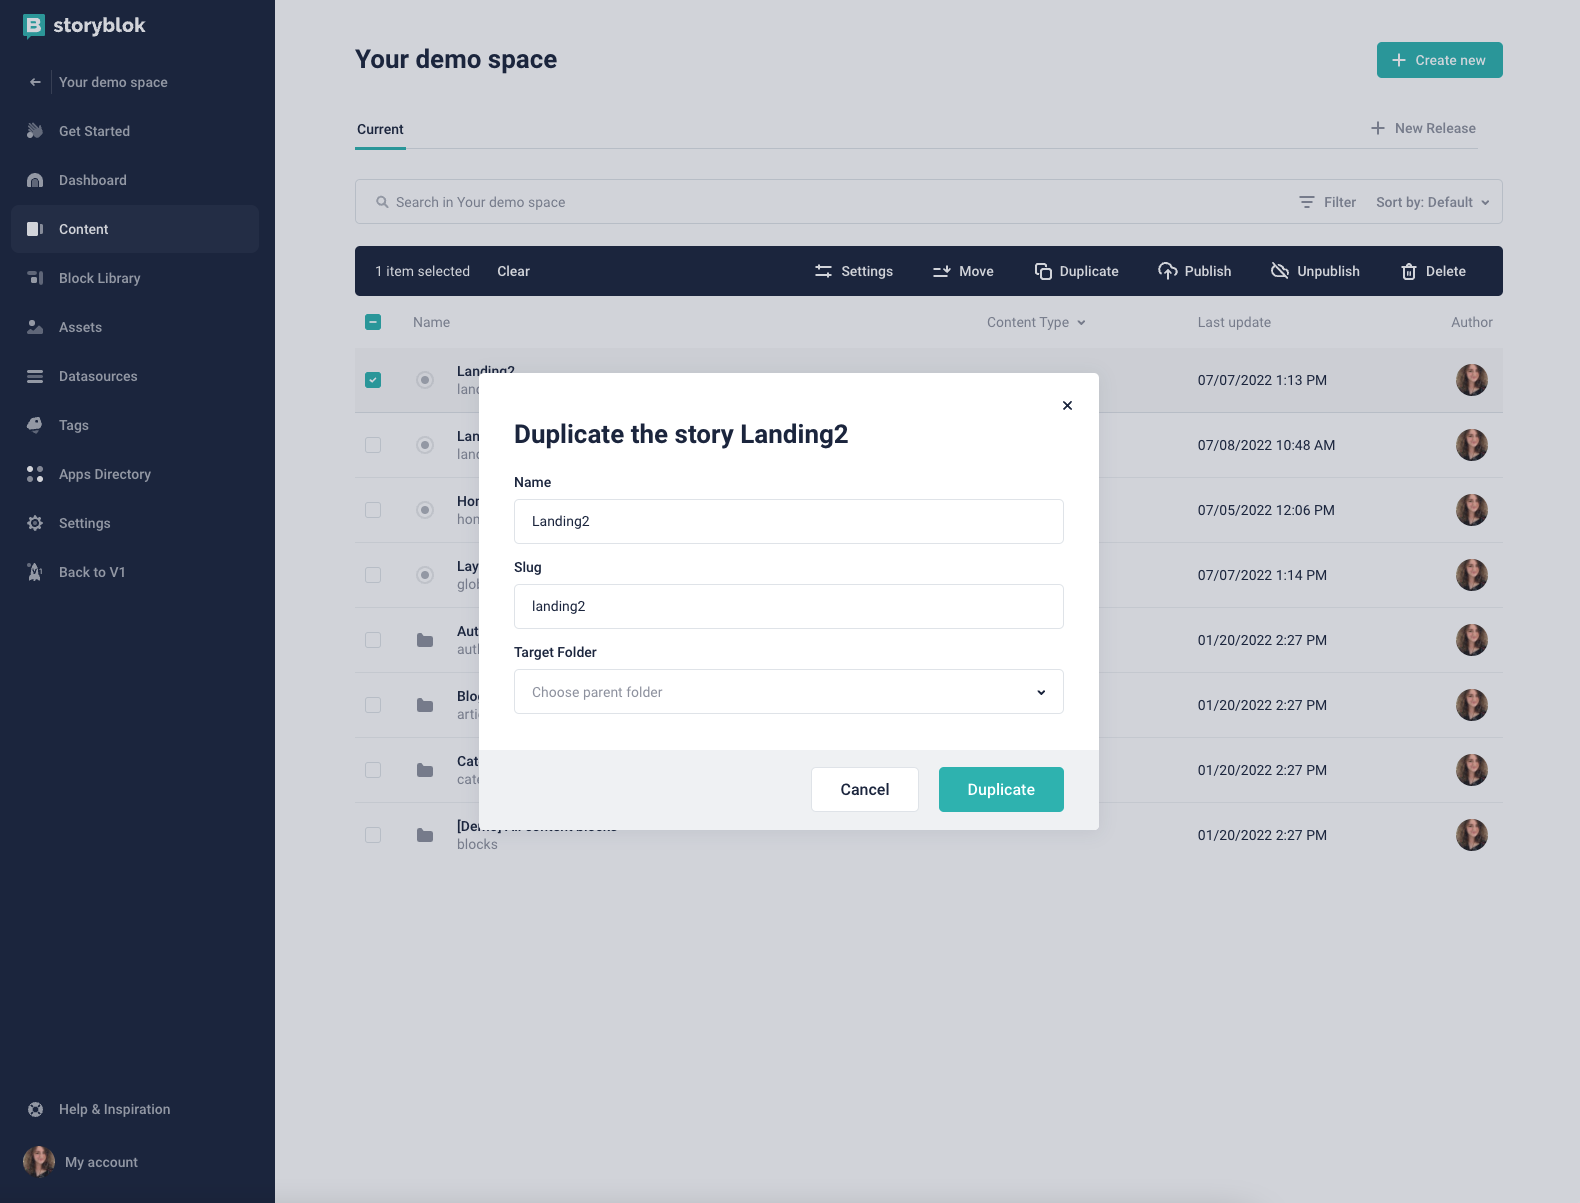
Choose the target folder to decide where the duplicates will be stored. Then, click Duplicate. You can then go into the entries and adjust them as necessary.
Duplication can also be done from the Story itself. Click on the content you want to duplicate from the content area. Then, from the editing interface, open the Story menu {1}. Scroll over the Story you want to copy and select the three dots. Click Duplicate {2}.
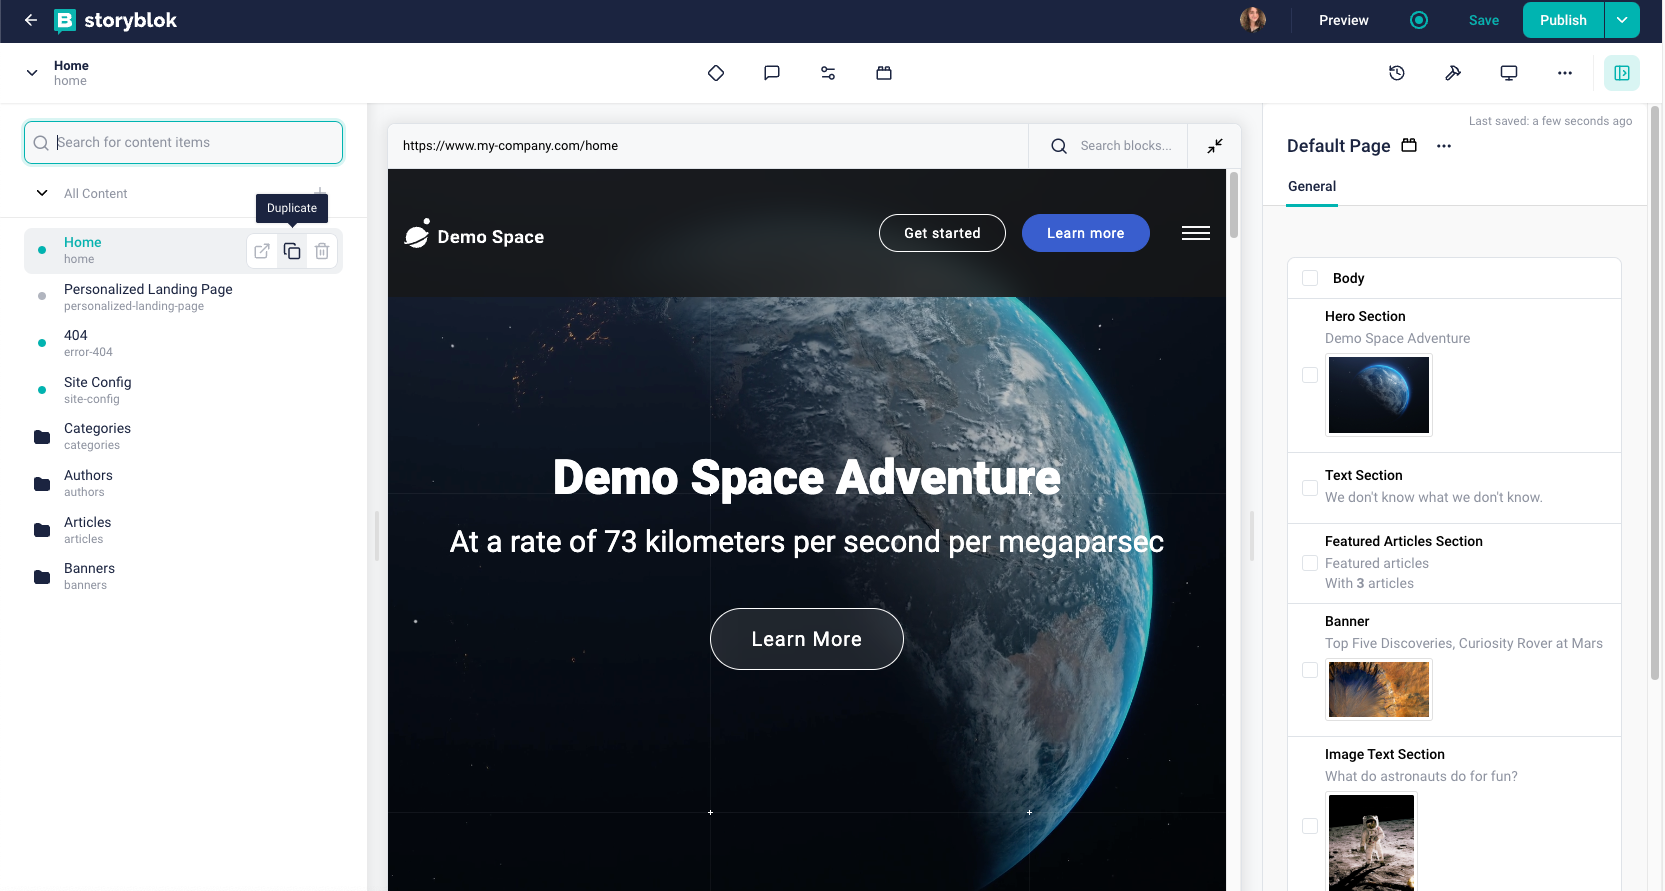
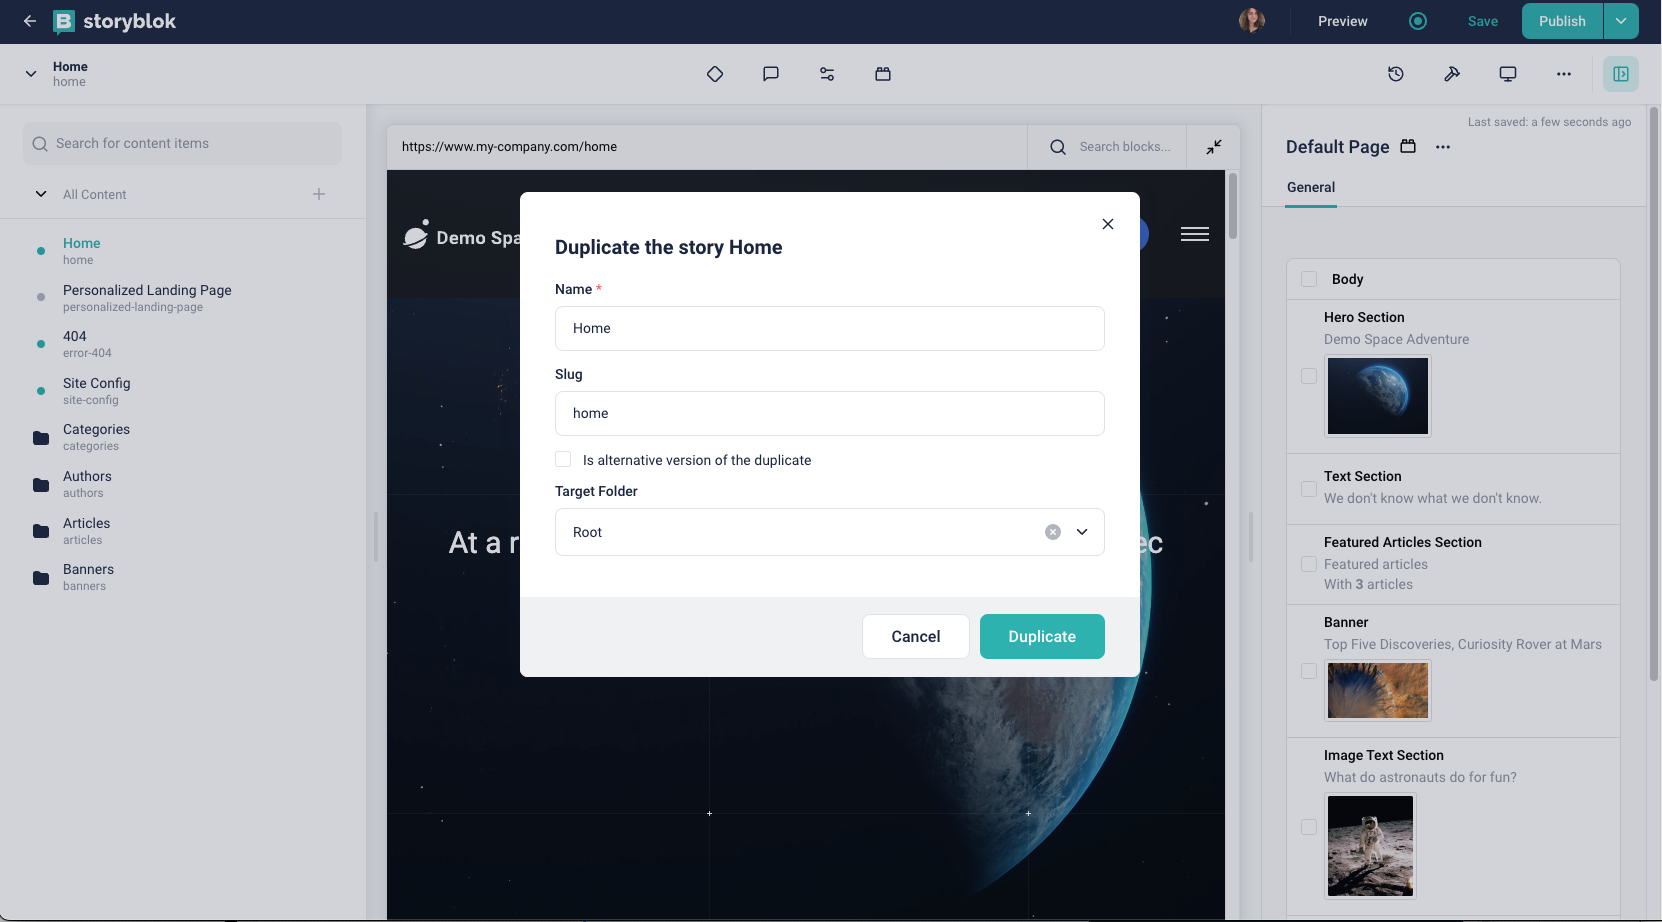
In the new window, choose your desired Name {1}, Slug {2}, and Target Folder {3}. You can also label the story as an alternate version if necessary. Then, click Duplicate {4}.
Duplication is an easy way to repurpose old content. In cases where you want to use the same structure of an older piece of content, duplication can save you a lot of time. Just copy the old Story, give it a new name and an appropriate slug, and edit the new copy with your new content.