Organization Area
Please note that Storyblok's documentation is currently undergoing major restructuring. Most resources can now be found on the dedicated documentation platform. This resource and others will be updated and moved shortly.
The organization area allows you to get an overview of all your spaces and to manage users and your subscription.
Organization Dashboard
In your organization dashboard, you'll encounter three charts offering a swift summary of the total number of spaces, users, and Monthly Traffic. Following this, you'll find a breakdown of your organization's detailed traffic usage, along with sections highlighting recently used spaces and newly added users.
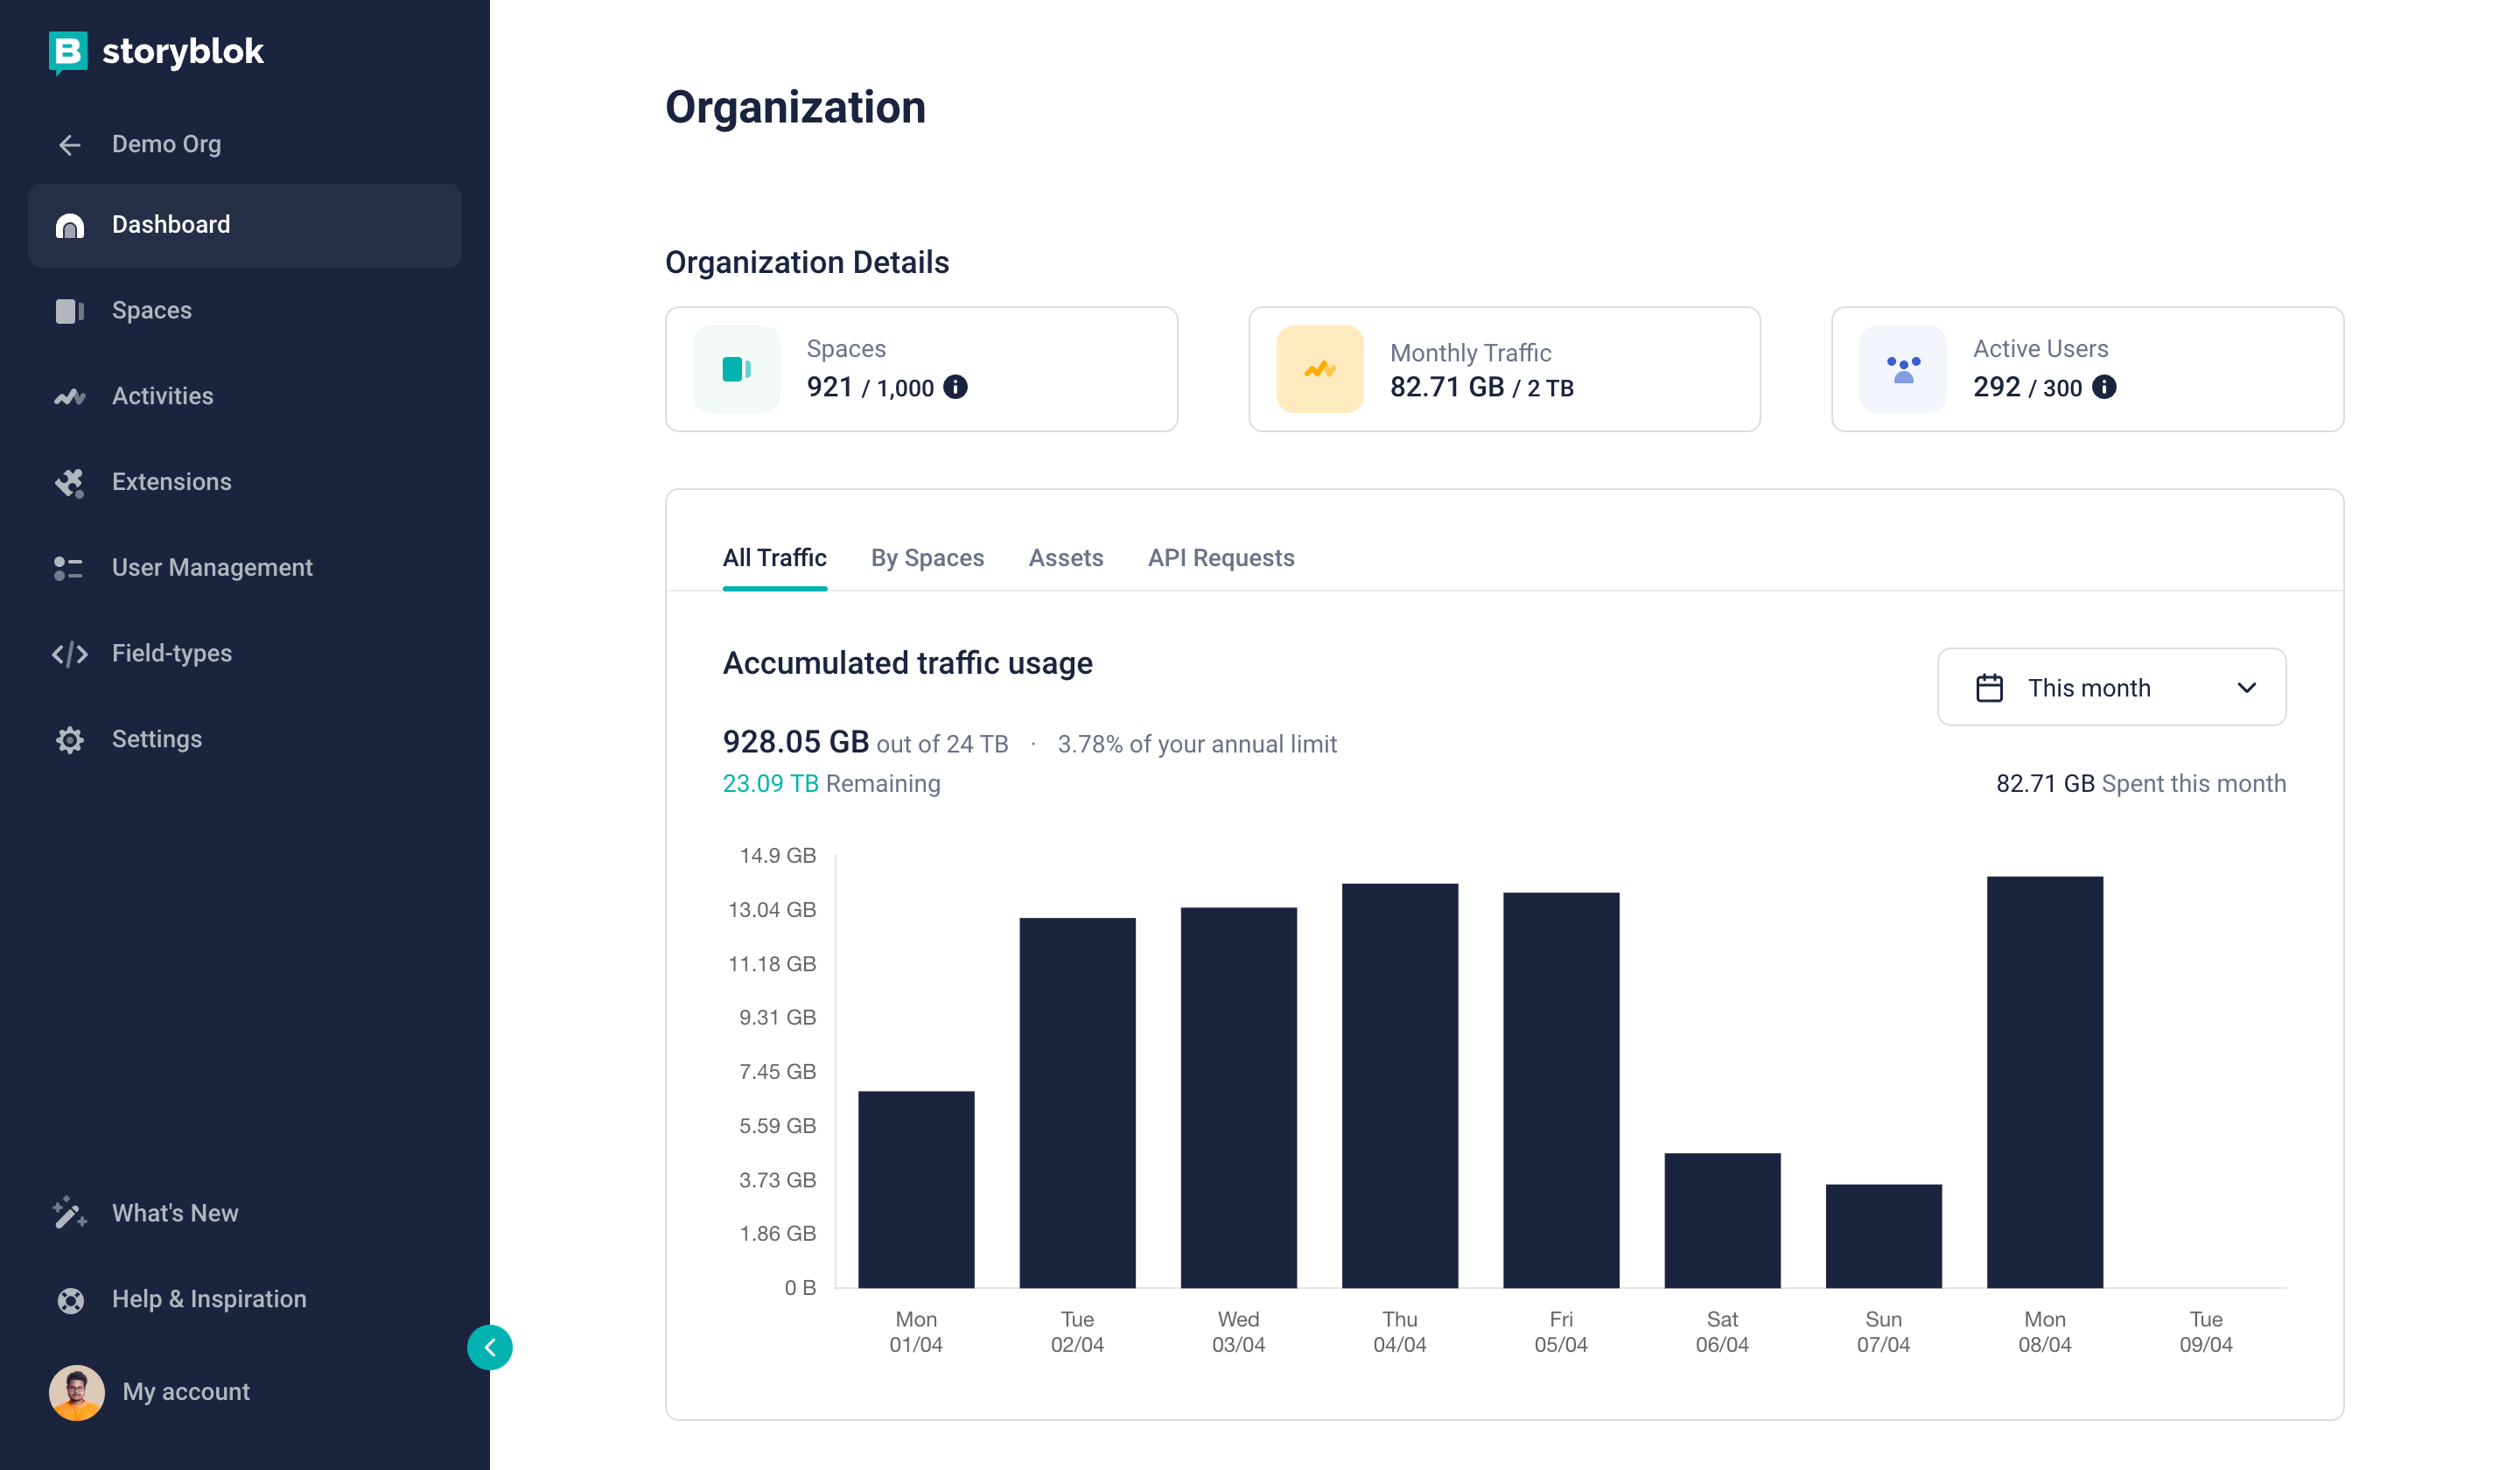
Organization area dashboard
The traffic overview section in the dashboard provides a detailed analysis of traffic usage for your entire organization. It includes standard metrics for the last 30 days, 90 days, 6 months, 1 year, and all-time usage. Additionally, you can view traffic details for each space within your organization. The section also features tabs for asset traffic usage, showcasing popular assets by traffic usage, and API request traffic analysis for comprehensive insights into your organization's traffic patterns.
Users
An overview of all users in your organization. Those include your own team and all your customers or external members. You can assign each of your users a role in your organization. Available roles are:
- Owner
Deprecated- Access to the organization area
- Can manage users (all roles)
- Can manage subscription
- Access to invoices
- Admin
- Access to the organization Area
- Can manage users (cannot assign ownership)
- Member
- Does not have access to the organization area
Owner and admin should be used for your team. The member role is for your customers who should not see other organization members. The roles do not have any effects on the collaborator roles per space, as they are only assigned within the organization. The collaborator logic is still the same for each space.
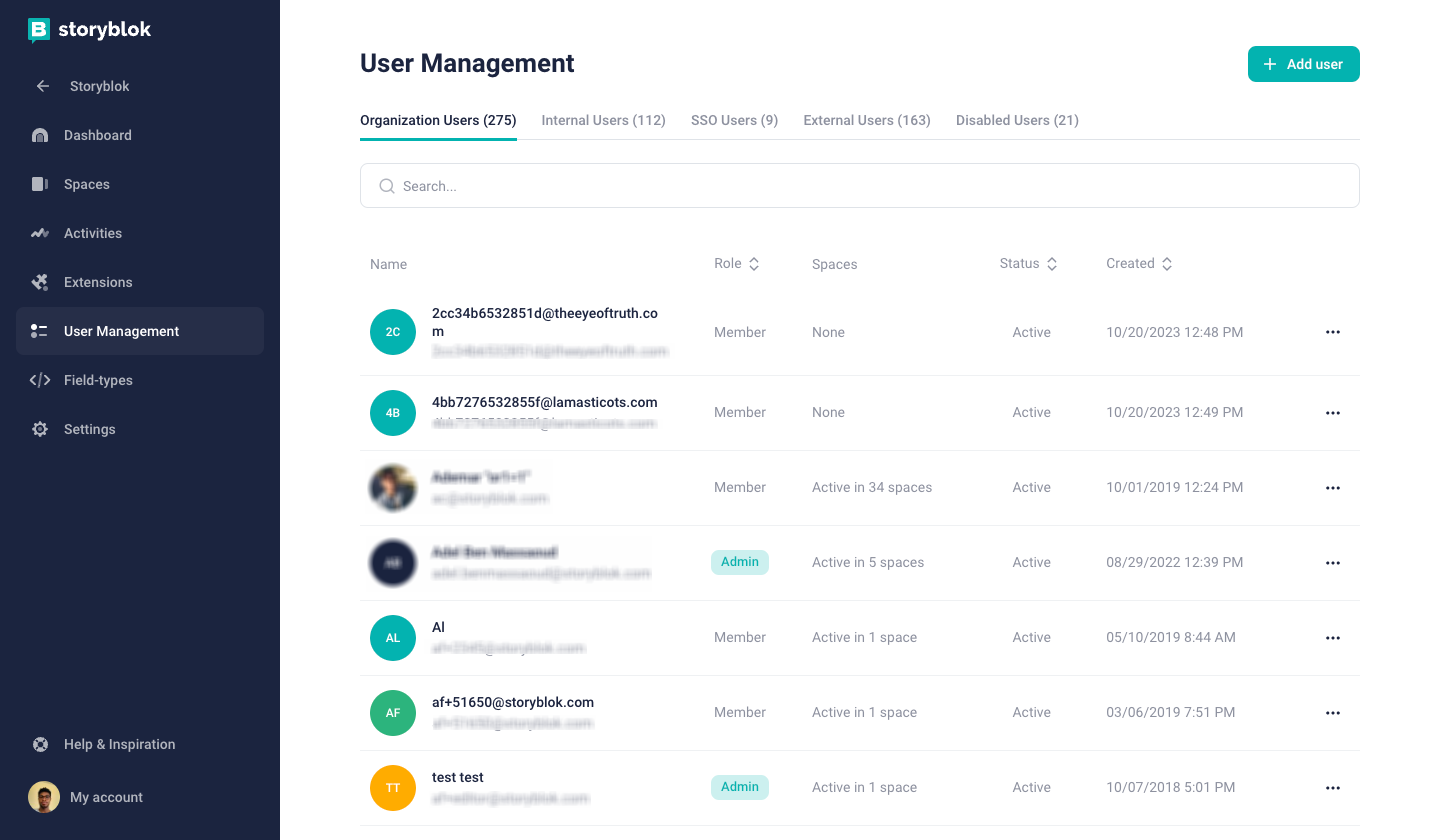
Organization area dashboard
Settings
Information of your organization's name and additional configurations for white labeling and other specific configurations for your organization.
Organization settings
Organization Activities
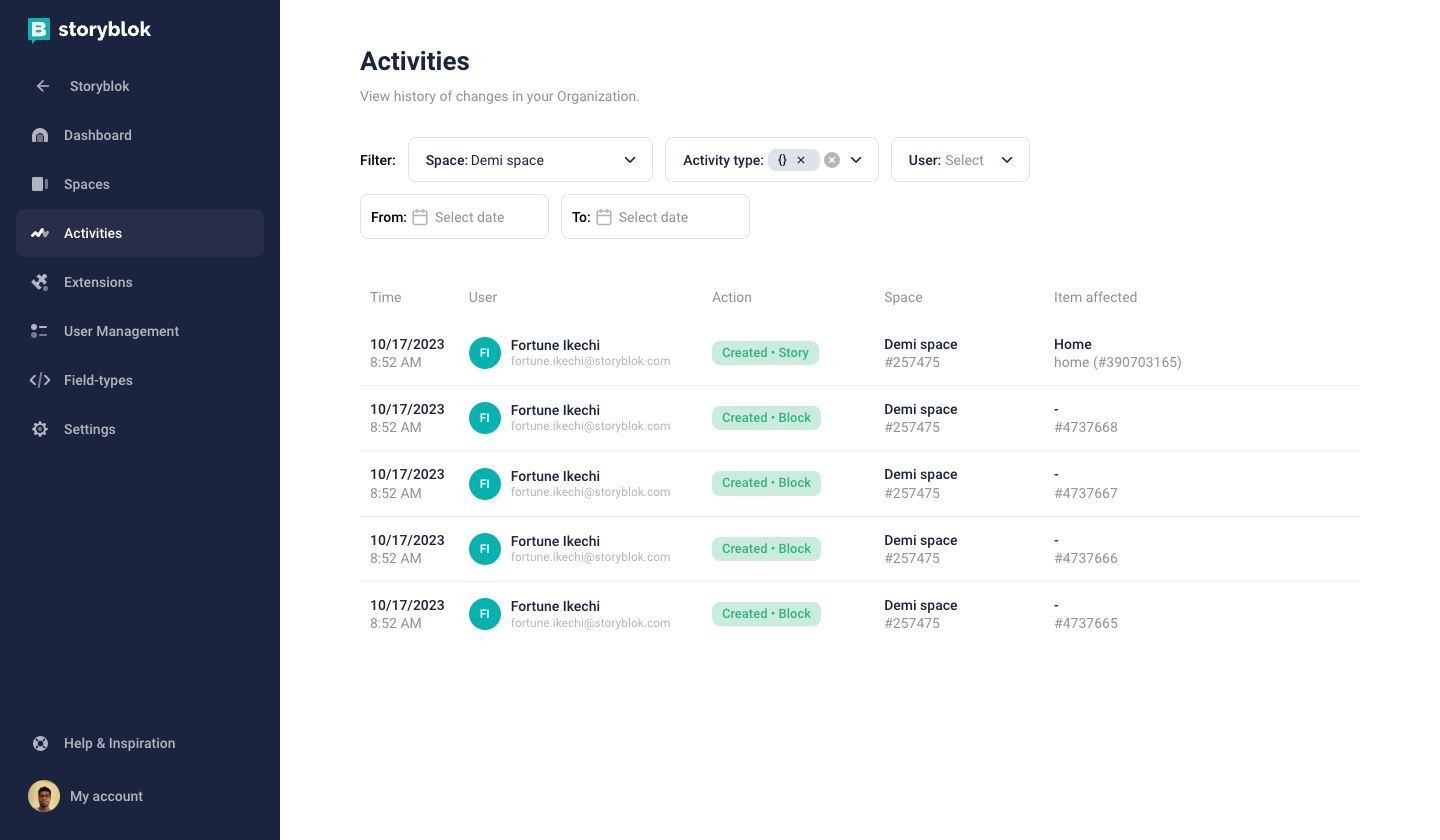
With the Activities log, you can see an overview of all activities in your organization. To get a more tailored view, you can filter activities by:
- Spaces {1}: Select specific spaces in your organization.
- Activity type {2}: Choose from various activity types such as Blocks, Stories, Workflows, Workflow Stages, and Stage Changes.
- Users {3}: With this, you can filter activities associated with a specific user or a group of users.
- Dates: Use the From {4} and To {5} filters to see specific activities on a selected date.
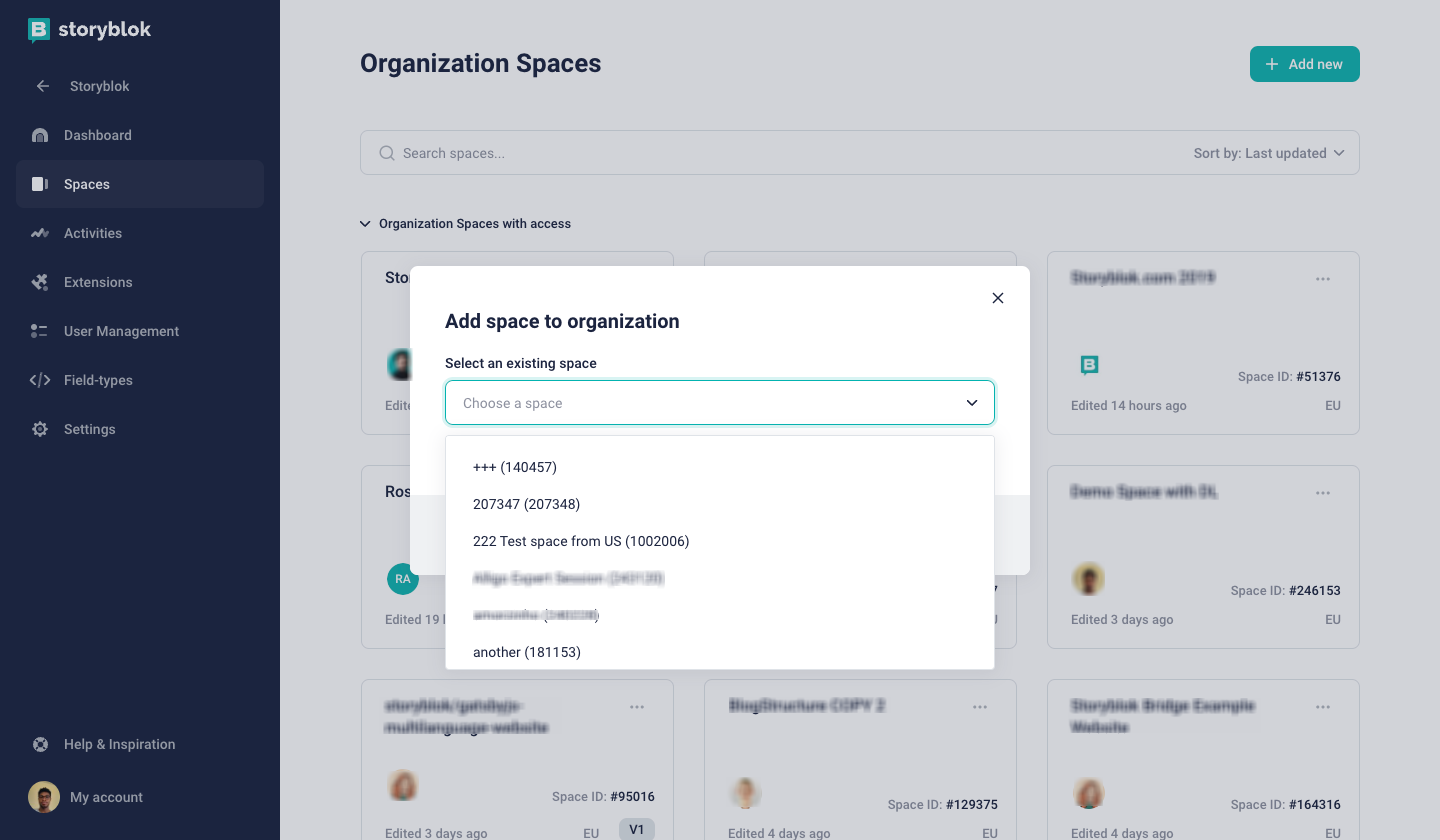
Adding space to organization
To add a space to your organization, navigate to your organization dashboard and click on the "Spaces" tab {1}, click on the "Add new" button {2}, and select the space you want to add to your organization using the input field {3} and Save. The space will now appear in your organization dashboard.
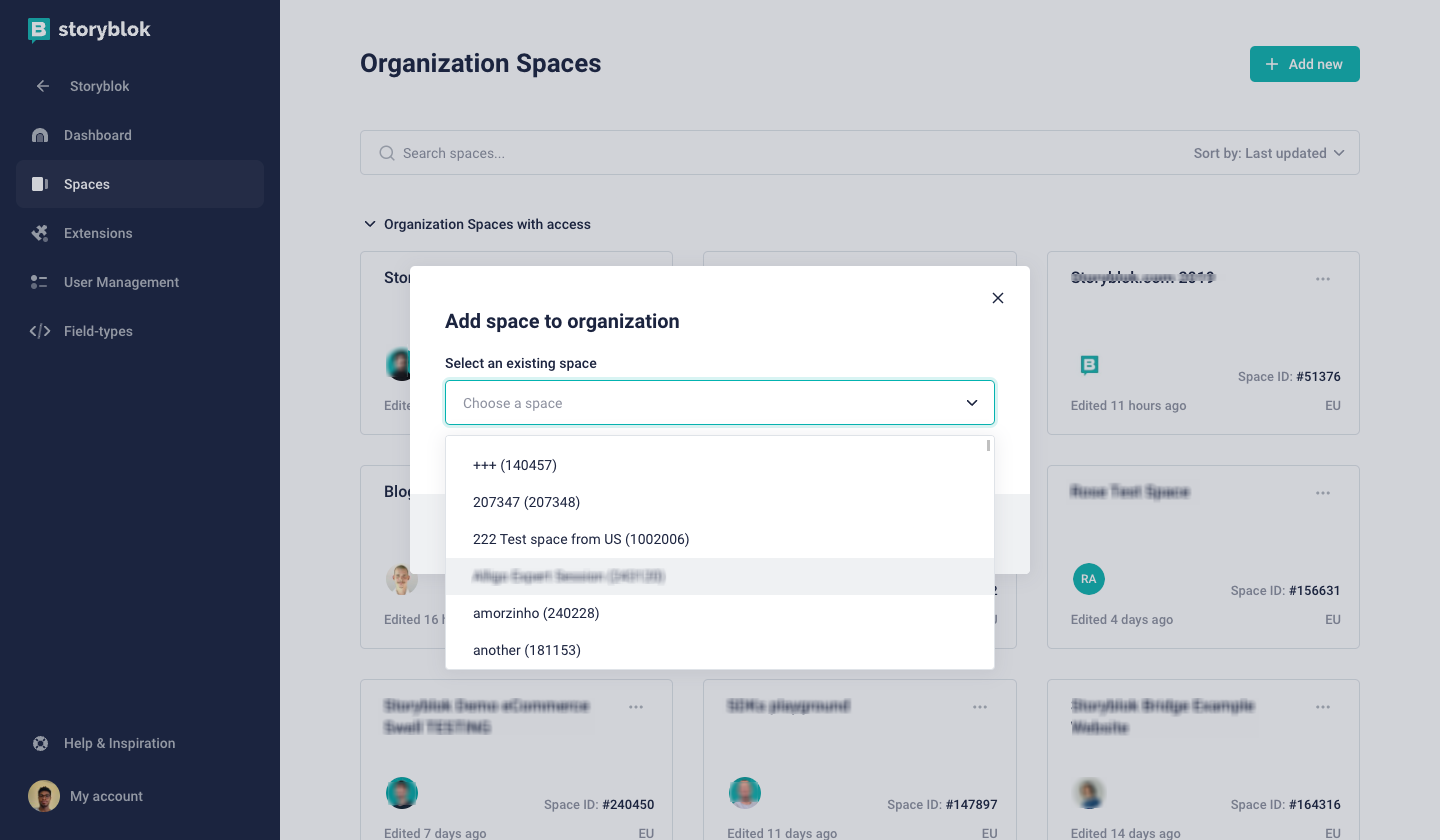
Adding a space to an organization
Removing a space from an organization
To remove a space from your organization, navigate to your organization dashboard and Click on the Spaces tab {1}, Click on the ellipsis {2} on the space they want to remove, and then click the "Remove from Organization" button {3} to remove it.
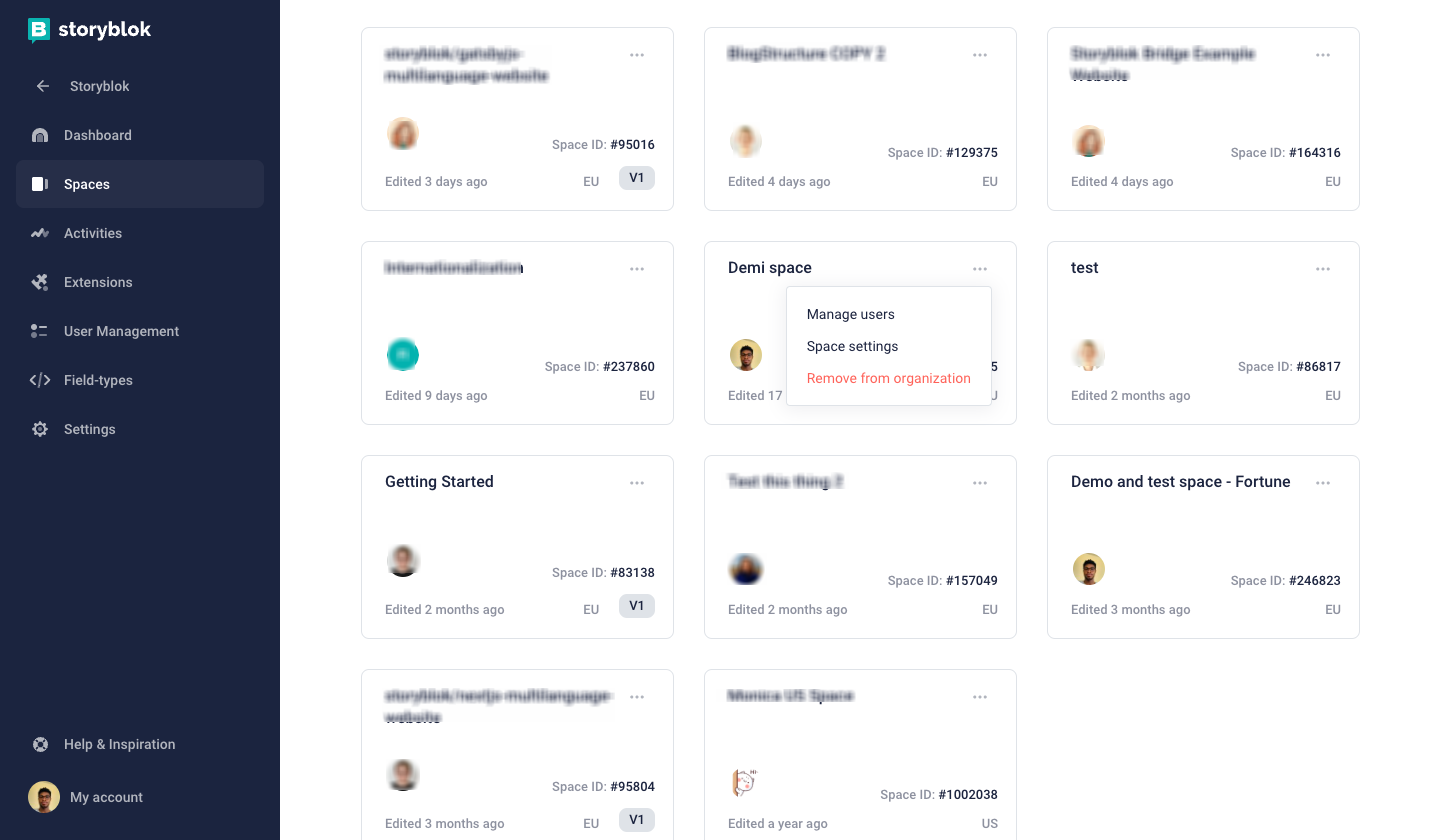
Remove spaces from organization
Add users to the organization
To add users to an organization, navigate to the User Management tab on your organization {1} and click the Add user {2} button.

Adding users to an organization
Next, fill in the user details, outline the user role {1} and save, as shown below.
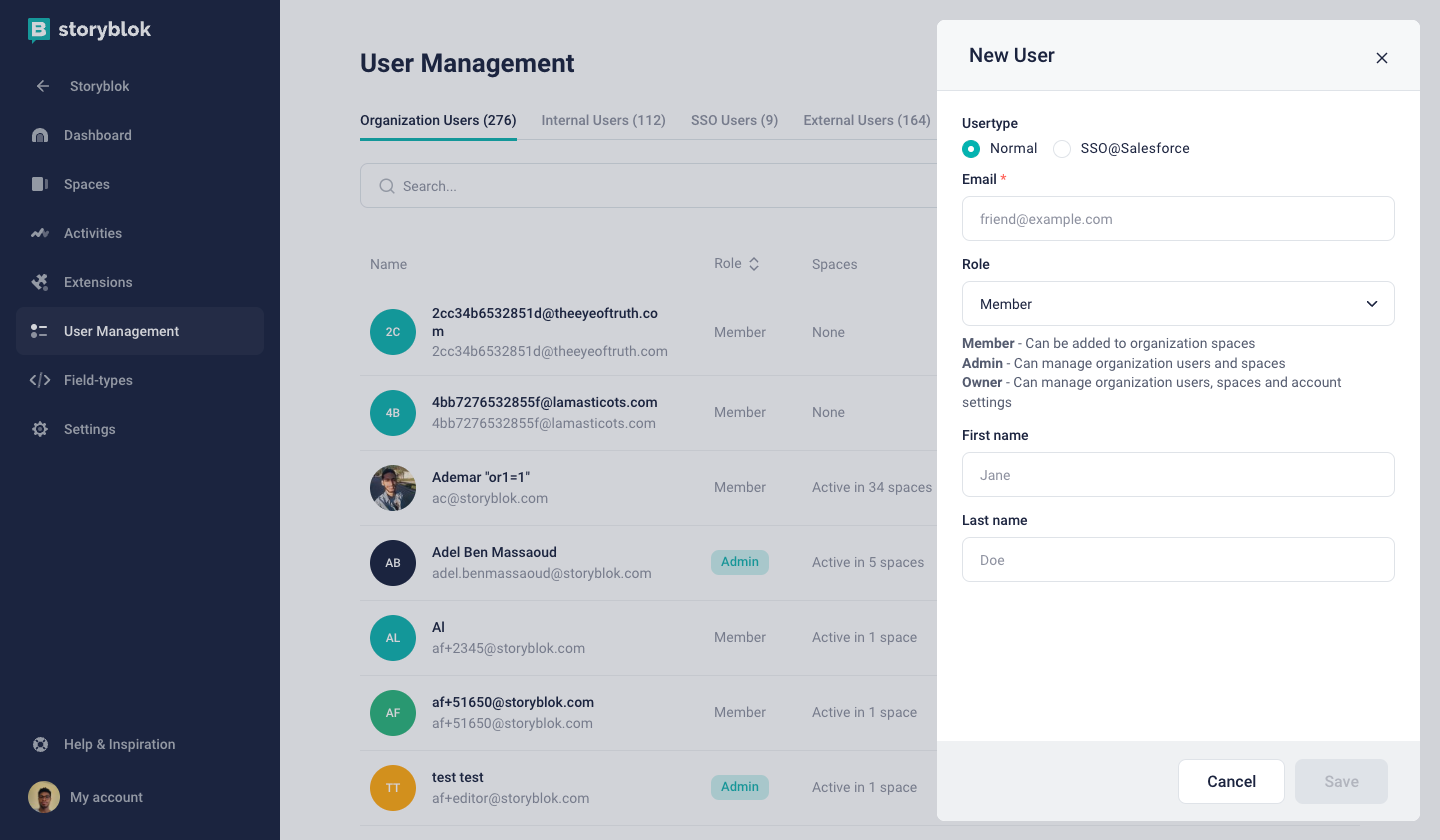
Adding a user and specifying user role
You can only invite users to an organization and space if you're an admin.
Organization Security
In the organization, navigate to Settings > Organization Security, wherein it is possible to define a custom confidentiality disclaimer that will be shown as a modal to all organization users whenever they log in to Storyblok.
Disable private space creation
This option is only available on the Enterprise plan.
To disable members of your organization from creating private spaces, navigate to the Settings tab on your organization {1} and click the Spaces Creation {2} button. After toggling the Disable Private Spaces {3} option, click the Save {4} button.
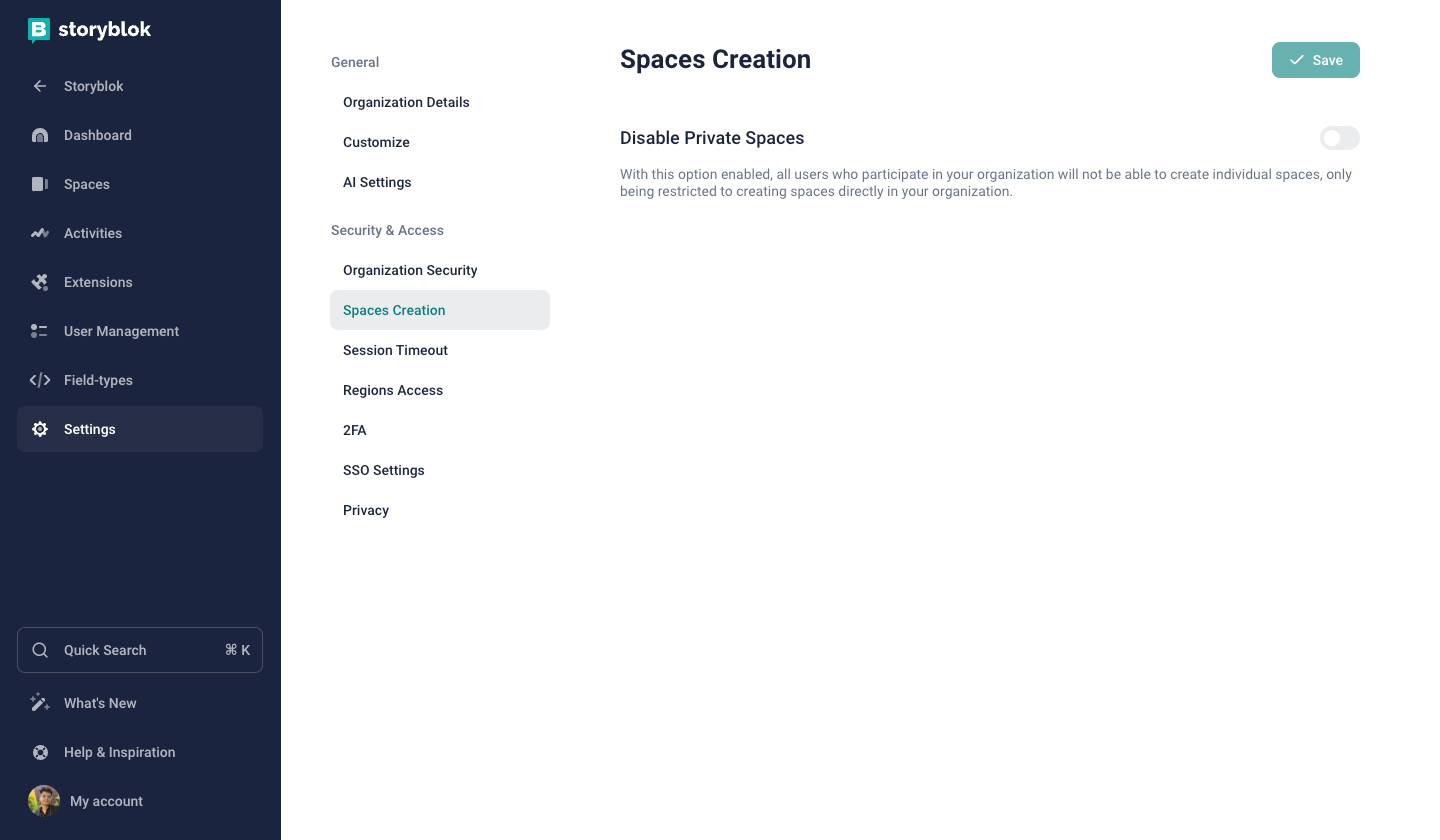
Manage Spaces Creation
Enable Timeout session customization
This option is only available on the Enterprise plan.
To customize the session timeout, navigate to the Settings tab on your organization {1} and click the Sessions Timeout {2} button. After toggling the Enable Timeout session customization {3} option, you can choose between days and hours in {4} and then click on the Save {5} button to save your changes.
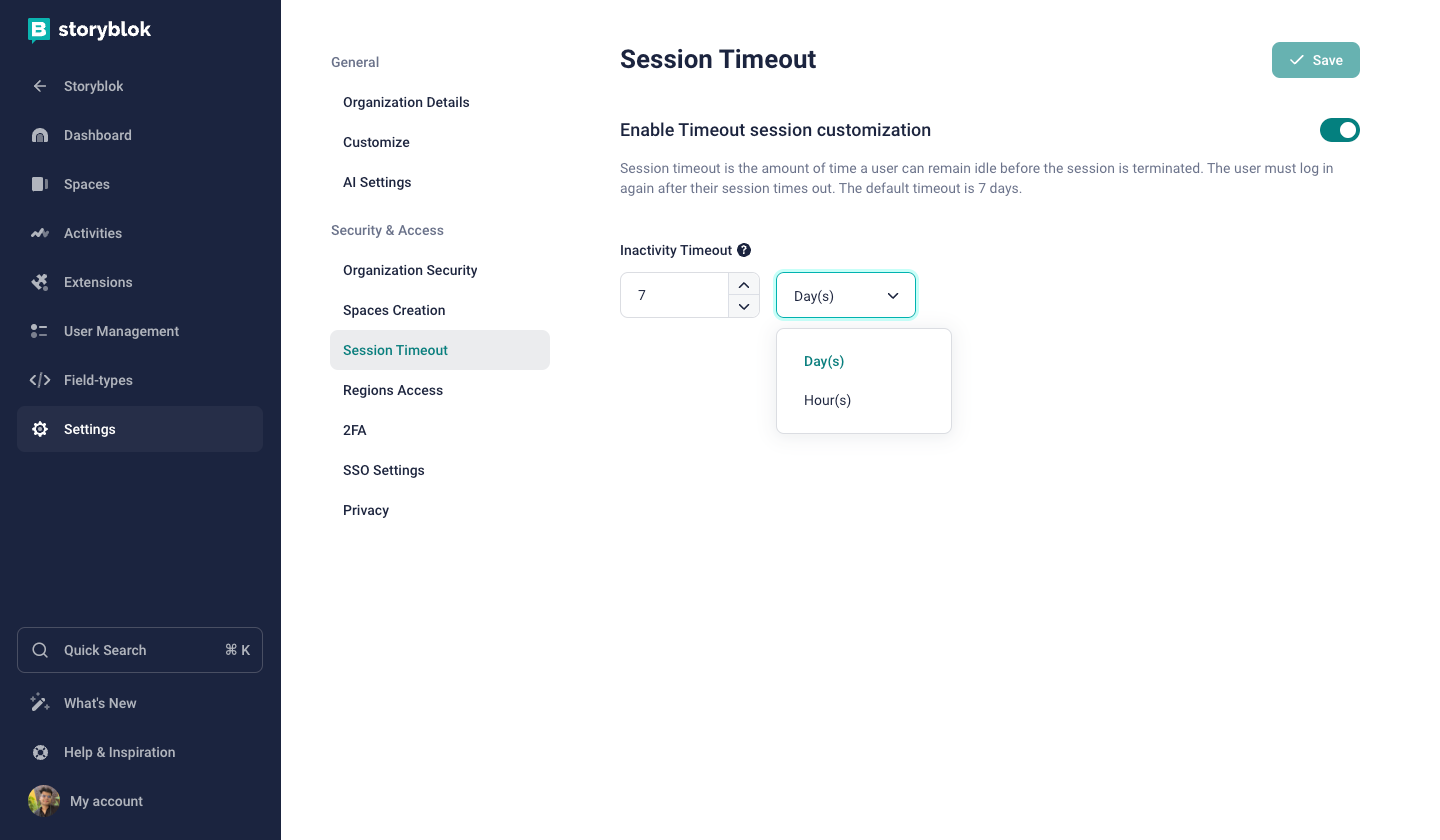
Manage Session Timeout
Manage regions for Organization spaces
To manage regions for your organization spaces, navigate to the Settings tab on your organization {1} and click the Regions access {2} button.
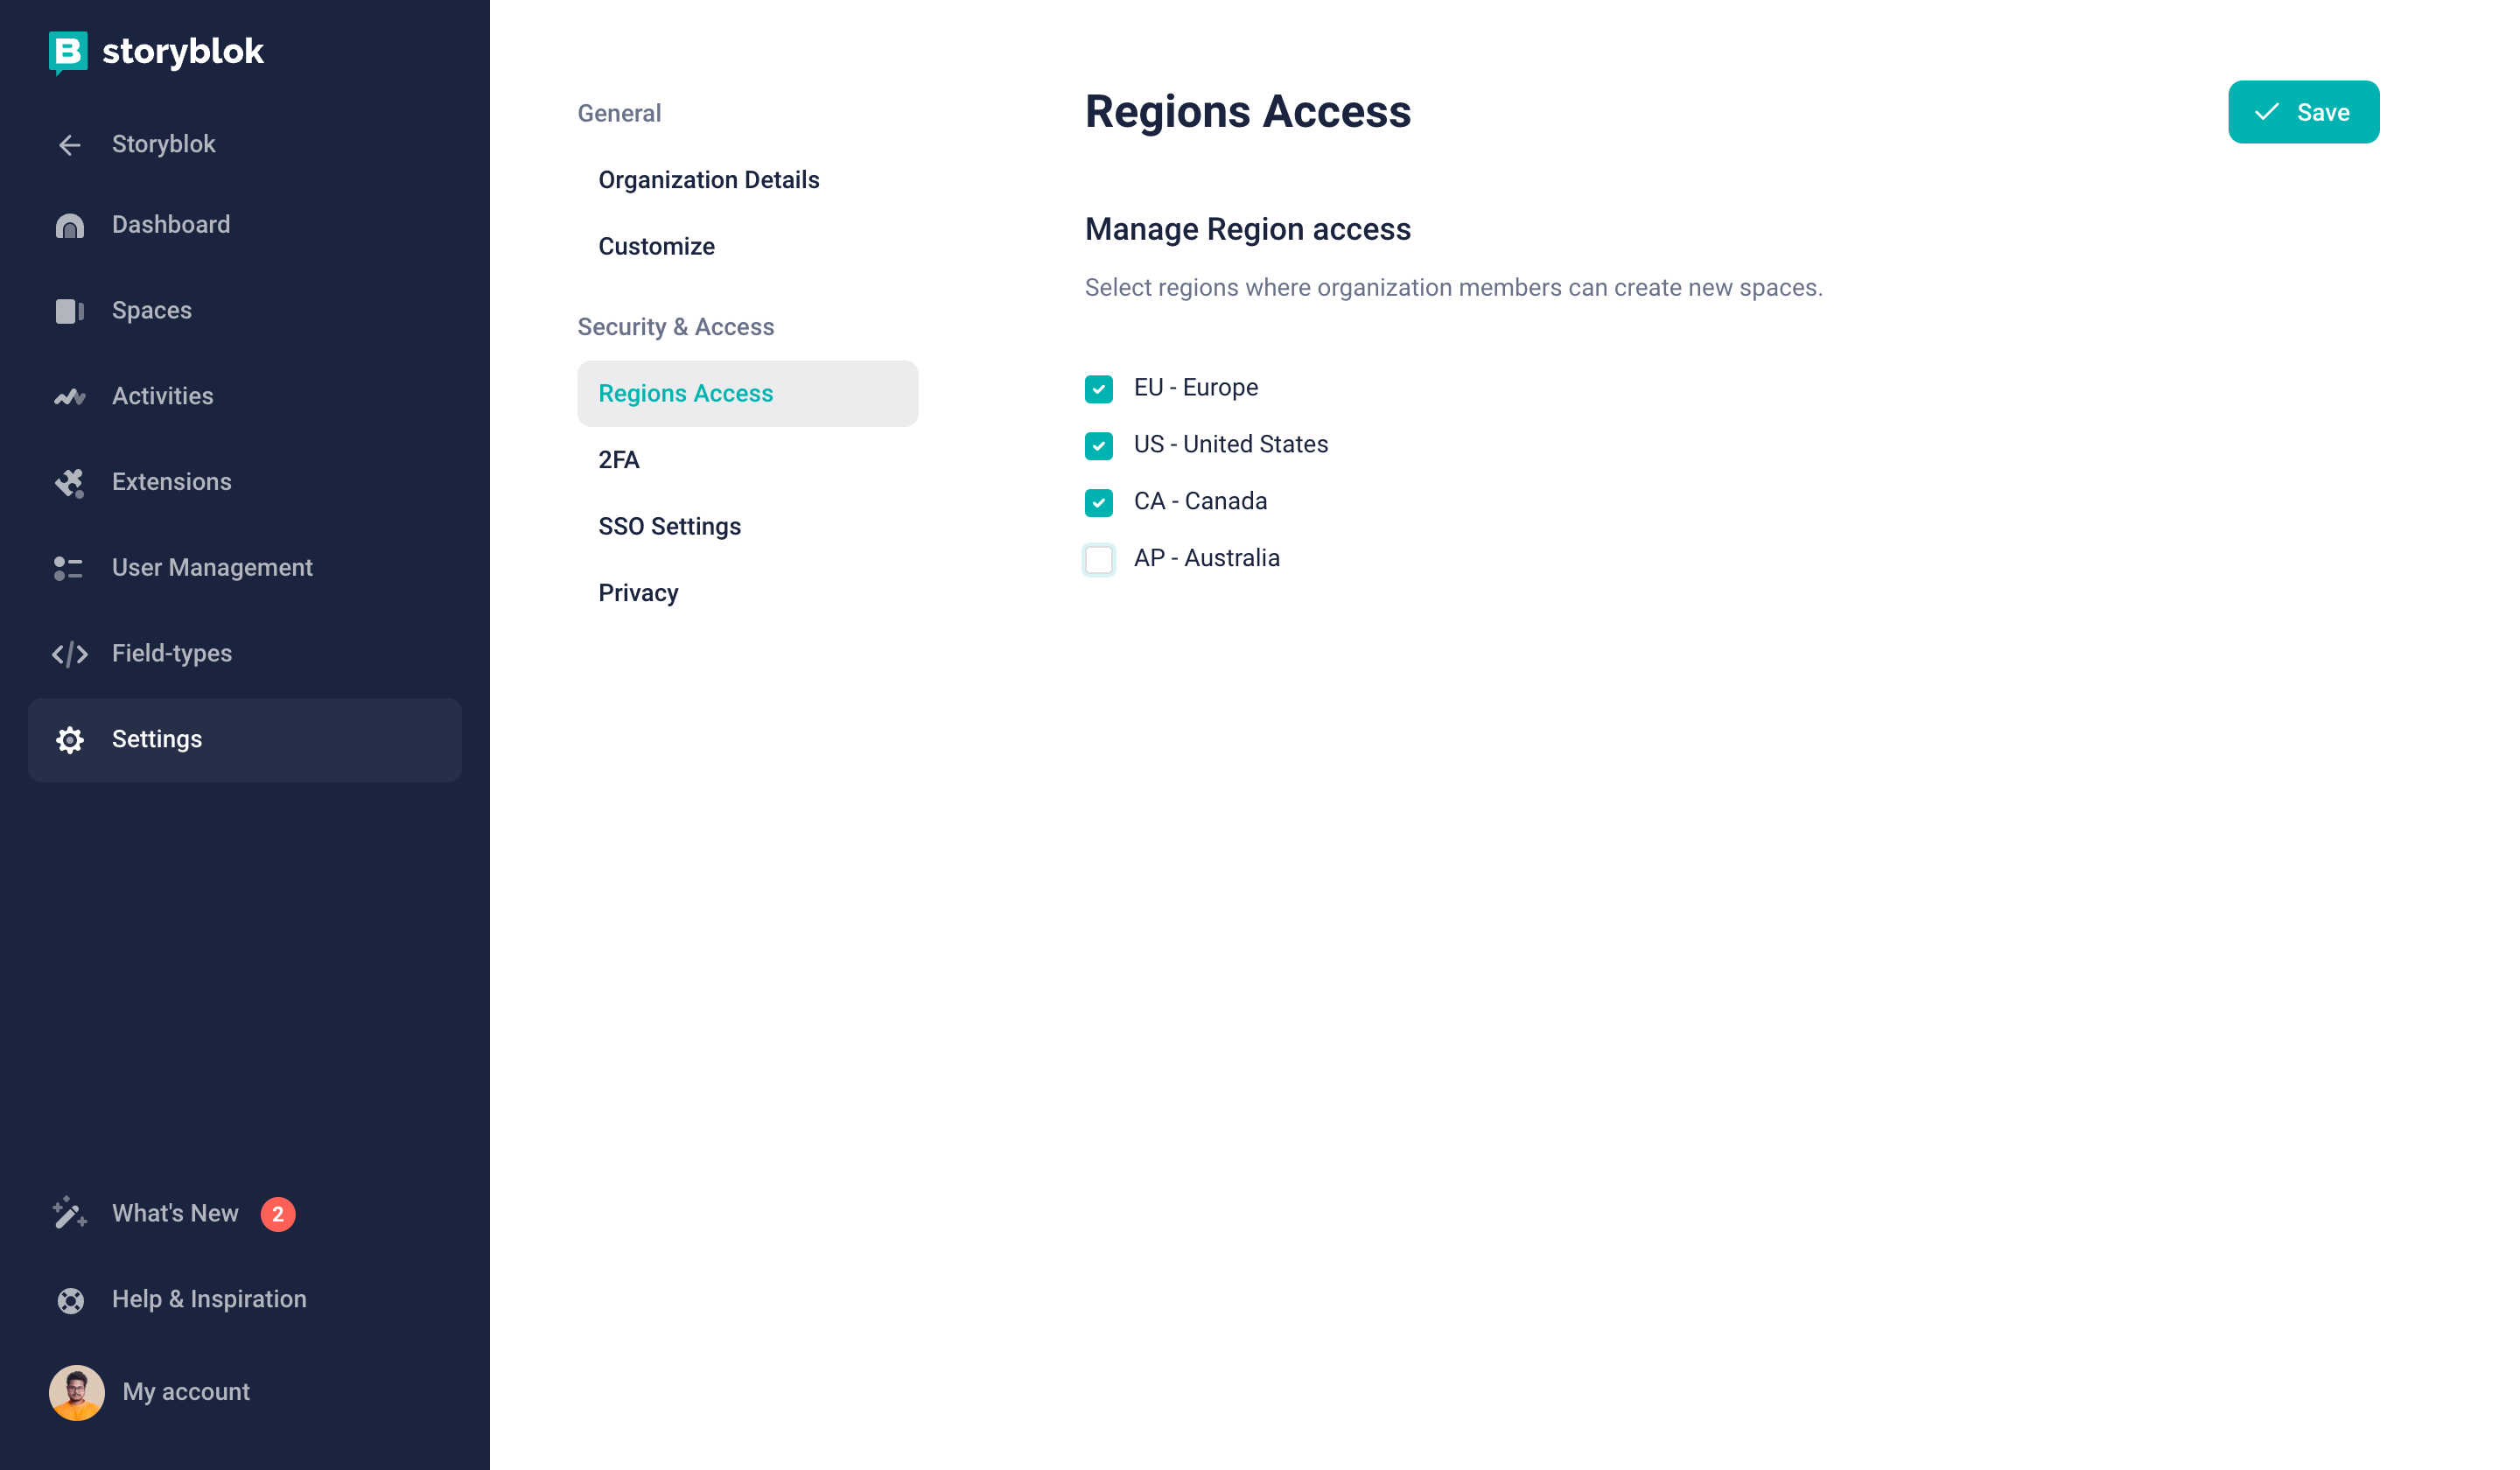
Manage Region Access
Select or unselect all the regions you want to have {3} and click the Save {4} button.
Enable Storyblok Labs features
To toggle Storyblok Labs features for a space within an organization, you must first activate Labs for the whole organization.
To enable them, navigate to the Settings tab on your organization {1} and click the Labs {2} button. You can then enable specific features, such as Ideation Room, by clicking on the respective toggle. {3}
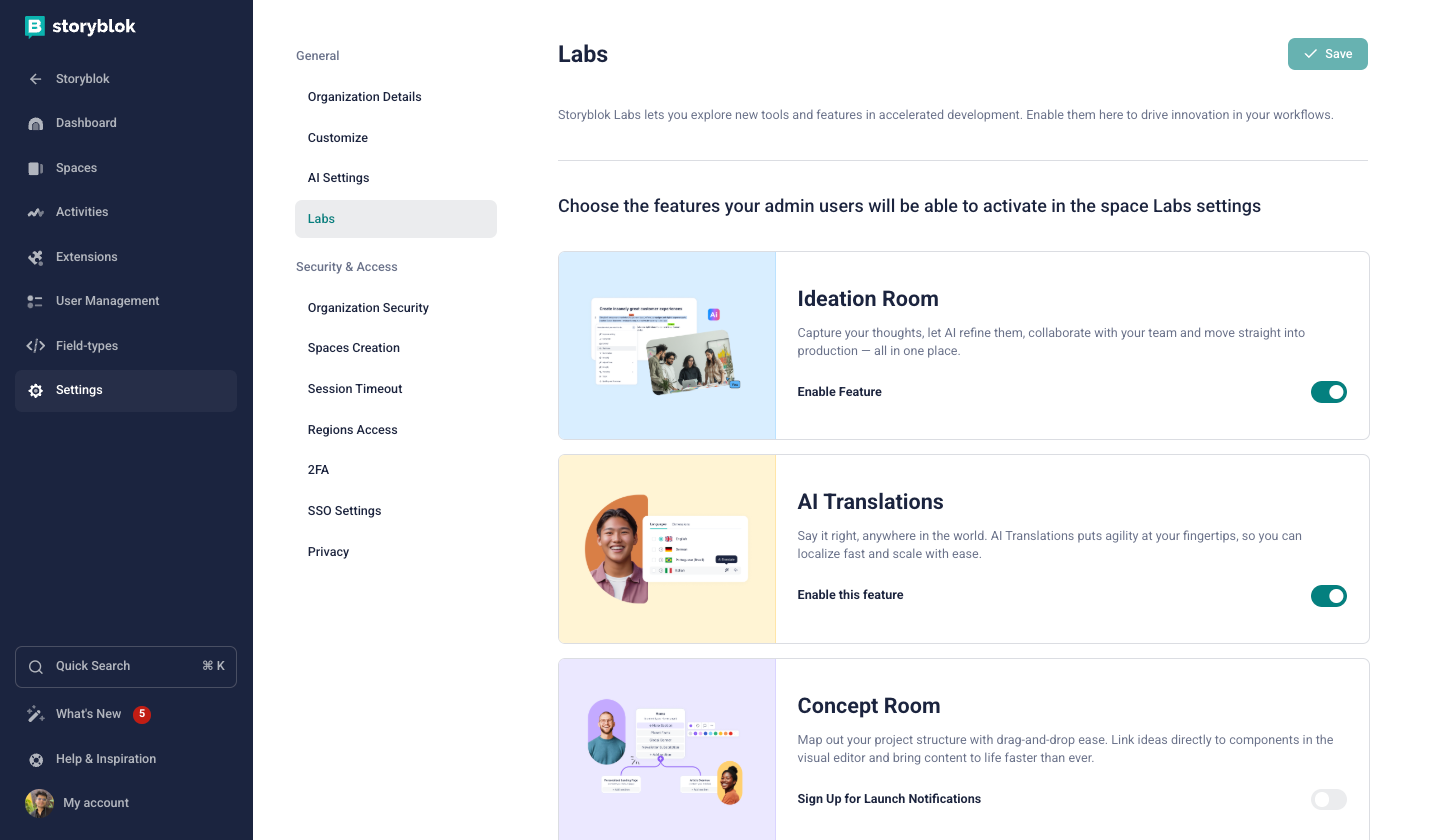
Manage Storyblok Labs Features
You'll need to accept the terms and conditions the first time you activate a feature. {1} . Select the checkbox, and click on Confirm. {2} After that initial acceptance, you can freely turn features on and off without repeating this step.
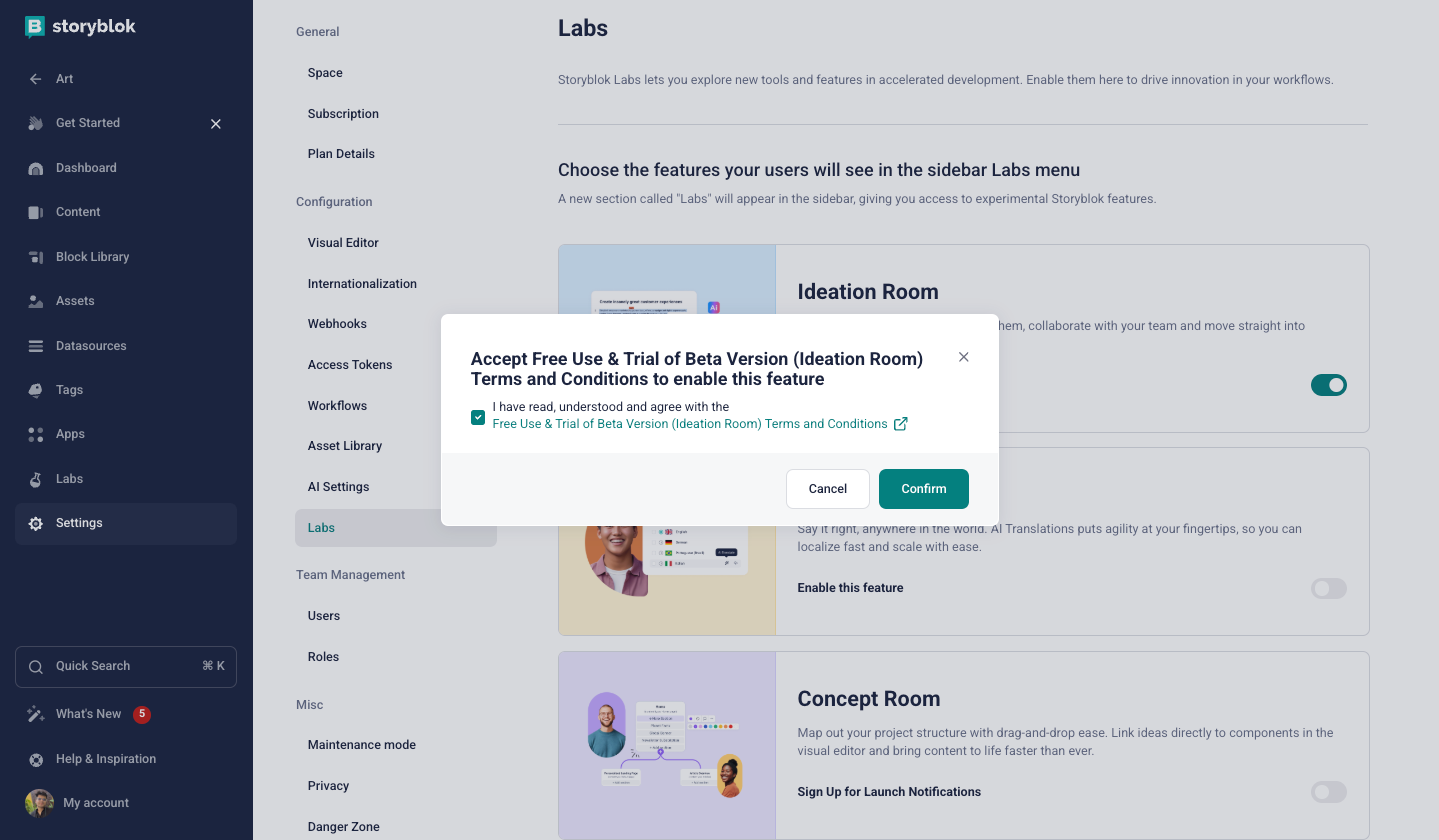
Accept Storyblok Labs Terms